
Change Your Ford Key Fob Battery Without Damaging the Case
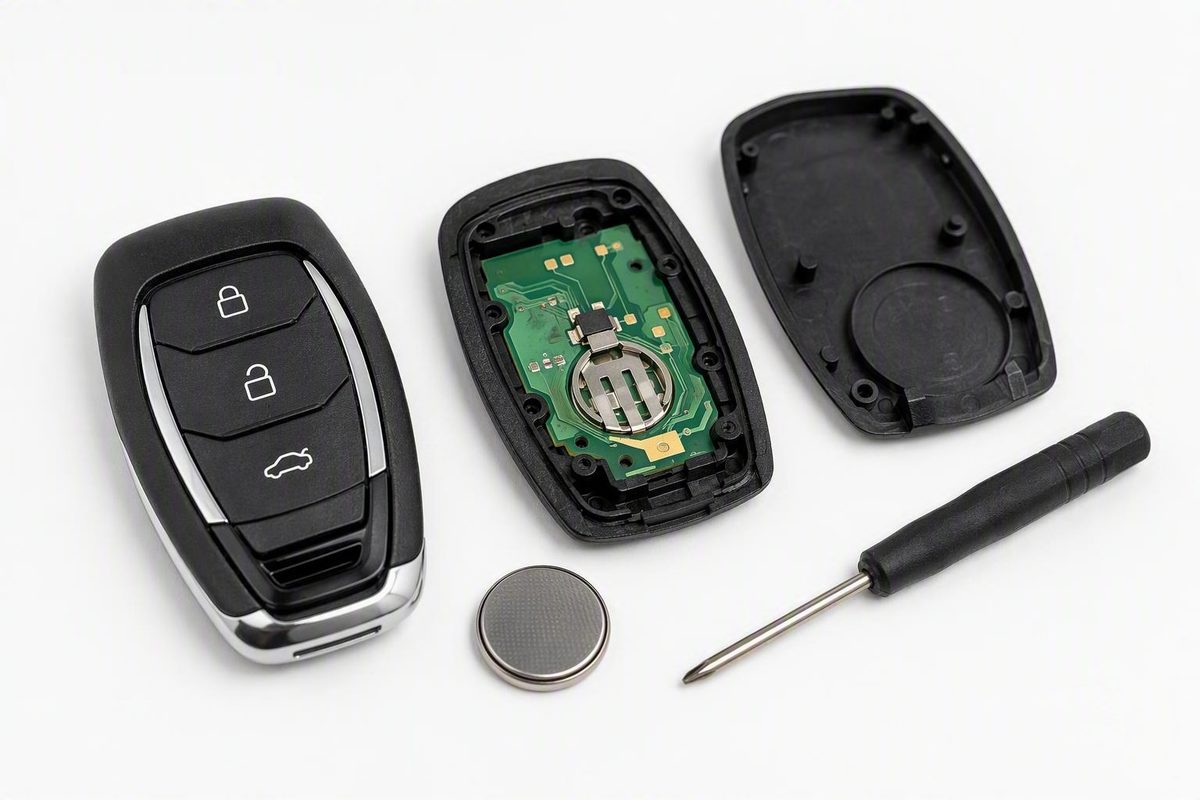
Verify the battery specification, open only at the intended access point, record its position, install an exact match, close without force and test every function.
Replacing a Ford key-fob battery is usually a manageable DIY job, but Ford fobs do not all use the same battery, opening method, or battery orientation. The Ford badge alone does not tell you what is inside.
The safe workflow is simple: verify the specification, open the fob only at its intended access point, record the original battery position, install an exact replacement, close the case without forcing it, and test every equipped function. Your model-specific Owner’s Manual and the markings inside the fob take priority over general instructions.
Confirm That a Weak Battery Is the Likely Problem
A weakening key-fob battery often causes gradual changes rather than an immediate total failure. Possible warning signs include:
- Shorter lock or unlock range
- Delayed response after pressing a button
- Intermittent operation
- Having to press a button repeatedly
- Difficulty using lock, unlock, or trunk-release controls
- A low-key-battery message in the vehicle
- Passive-entry or push-button-start recognition problems
For example, a fob that once worked from across a parking area may begin operating only when you are beside the driver’s door. It may respond normally on one attempt and fail on the next. These are useful weak-battery warning signs, but they do not prove that the battery is responsible.
A damaged button, poor battery contact, corrosion, water exposure, internal electronic damage, or a vehicle-side recognition problem can cause similar symptoms. If only one button has stopped working while every other function remains reliable, the problem may be localized to that control rather than the battery.
Before opening the fob, inspect the exterior for:
- A cracked or separating housing
- A button that is stuck, torn, or unusually soft
- Evidence that the fob was dropped or crushed
- Moisture around the case seam or beneath a cover
- Corrosion or residue near an opening
- A mechanical key that no longer releases or locks into place
Make a note of anything unusual. Those observations may help if a fresh battery does not restore operation.
Ford directs owners to the “Keys and Remote Control” section of the model-specific Owner’s Manual for battery instructions. Ford also states that replacing the coin-type three-volt lithium battery does not erase the key programmed to the vehicle, so a routine battery change should not require reprogramming. Ford’s official key-fob guidance confirms both points.
Identify the Fob and Exact Battery Before Buying
There is no universal Ford key-fob battery. Do not infer the battery size, required quantity, opening method, or orientation from the Ford badge, vehicle name, or model year alone.
Use this verification process:
- Consult the model-specific Owner’s Manual. Look under “Keys and Remote Control.”
- Check the installed battery. Once the fob is open, photograph the complete code printed on the cell.
- Inspect the holder. Look for a battery-type label, polarity symbols, or an orientation diagram.
- Confirm that the references agree. The manual, holder markings, and installed battery should point to the same specification and orientation.
- Stop if they conflict. A previous owner may have installed the wrong cell, or the fob may be a replacement design. Obtain model-specific confirmation from a Ford dealer or qualified automotive locksmith instead of choosing one reference arbitrarily.
CR2032, CR2025, and CR2450 appear in dealership guidance for certain Ford fobs, but this is not a complete compatibility list. Dealership guidance likewise recommends checking the battery already installed rather than assuming one size.
Coin-cell codes also contain dimensional information. CR2025 and CR2032 are both 20 millimeters in diameter and are three-volt lithium coin cells, but a CR2025 is 2.5 millimeters thick while a CR2032 is 3.2 millimeters thick. The dimensional difference is documented in this CR2025 and CR2032 comparison.
That thickness difference matters. A cell that looks almost identical may not sit correctly in the holder. A thicker battery may prevent the case from closing, while a thinner one may not remain firmly seated against the terminals.
Do not try to compensate for an incorrect battery by:
- Forcing a thicker cell into the holder
- Squeezing the housing closed over a battery that does not fit
- Bending the battery contacts
- Installing an unverified stack of cells
- Adding foil or another conductive spacer
The evidence supports using the specified battery rather than modifying the holder or contacts. If the replacement does not fit naturally, remove it and verify the code, thickness, orientation, and required quantity.
As soon as the case is open, take a clear photograph showing:
- The complete printed battery code
- The battery face that is visible
- Any positive or negative symbol
- The location of retaining clips
- The arrangement of the battery holder
- Any markings beside or beneath the cell
Treat the photograph as a record, not as the only authority. Preserve the original orientation only when it agrees with the holder markings and model-specific instructions.
Gather the Battery and Opening Tools
You generally need only a few items:
- The verified replacement coin cell
- An opening tool that fits the fob’s designated notch, slot, cover, or seam
- An optional clean, lint-free cloth
A plastic pry tool is a sensible first choice because it is less likely to scratch the housing. Depending on the fob, dealership instructions may instead call for a small flat-tip screwdriver or a coin. The correct tool is the one that engages the intended access feature securely without slipping or requiring substantial force. General Ford-fob guidance describes a screwdriver or coin as suitable only at the relevant indentation or seam.
Work on a clean, well-lit surface. A light-colored lint-free cloth can protect the exterior and make the battery, mechanical key, cover, and other small pieces easier to see. Keep the old and new batteries separate so they cannot be confused.
Before starting:
- Remove loose exterior dirt without flooding the case seam with cleaner.
- Identify the key release, opening notch, seam, or battery cover.
- Position the fob so the intended opening feature is clearly visible.
- Open the replacement package only when you are ready to install the cell.
- Leave enough time to stop and consult the manual if the fob does not open as expected.
Do not insert a screwdriver into the middle of the housing or use the circuit board as a fulcrum. Tools should engage only the intended notch or seam. Forcing a tool into the case or prying against internal components can damage clips, weather seals, or the circuit board. Dealership instructions specifically advise lifting from the battery edge and opening the seam without forcing the case.
Stop if the tool is too thick for the notch, too narrow to engage securely, or prone to slipping. Unexpected resistance may mean that the mechanical key must be removed first, a latch has not been released, a cover needs to slide rather than lift, or the fob uses a different opening method.
Once the housing is open, do not wipe grease from the battery terminals or the back of the circuit board. Ford’s guidance specifically says to leave that grease in place; dealership instructions repeat the same caution. This Ford dealership procedure includes the terminal-grease warning.
Open the Ford Key Fob at Its Intended Access Point
Inspect the entire fob before prying. Look for:
- A mechanical-key release switch or button
- A concealed emergency key
- A small opening notch
- A slot sized for a coin or flat tool
- A seam between housing sections
- A removable panel
- A cover that appears designed to slide
Use the method that matches the actual access features.
If the fob has a concealed emergency key:
- Locate the release switch or button.
- Operate the release while pulling the metal key out gently.
- Inspect the newly exposed cavity for a notch, slot, or cover edge.
- Use that designated feature rather than choosing another point on the housing.
One documented Ford-logo-cover design allows the removed mechanical key to lift the logo side of the housing and reveal the battery. That is a procedure for a particular fob design, not a universal Ford method. Use it only when the shape, release, and cover arrangement match the documented fob. The design-specific sequence is shown by Avis Ford.
If the fob has a seamed housing:
- Find the designated notch along the seam.
- Insert a suitable plastic tool, coin, or small flat-tip screwdriver only into that notch.
- Twist gently rather than driving the tool deeper.
- When the seam begins to separate, work gradually around the edge.
- Release the clips a little at a time.
Stop if you hear cracking or see the plastic whitening around the tool.
If the fob has a sliding battery cover:
- Look for arrows, grip ridges, a release latch, or an obvious direction of travel.
- Release the latch, if present.
- Slide the cover in its intended direction.
- Do not pry the main housing halves apart if only the battery cover is designed to move.
Some fobs have a flip-out key or visible physical blade instead of a concealed key. These may have an opening notch near the hinge or a conventional case seam, but appearance alone is not enough to establish the procedure.
Pause if the fob does not match any of these patterns. Search the exact Owner’s Manual using the vehicle model and year, then compare its illustrations with the fob in your hand. A Ford dealer or qualified automotive locksmith can also identify an unfamiliar or replacement remote before the case is damaged.
Remove the Old Cell and Install an Exact Replacement
Do not lift the old battery out immediately. First photograph it and record:
- The complete battery code
- The voltage marking
- Which face is visible
- The holder’s positive and negative markings
- How the cell sits beneath or beside any retaining clips
- The holder arrangement and indicated quantity
Next, inspect how the battery is retained. It may sit in a circular recess, slide beneath a retaining lip, or be secured by a clip. Identify an accessible edge that can be lifted without pressing against the circuit board.
To remove the battery:
- Stabilize the fob on the work surface.
- Lift from the accessible battery edge or release the designated retainer.
- Apply only enough pressure to free the cell.
- Do not pry against the circuit board.
- Do not bend a contact out of the way.
Place the old and new batteries beside each other with their labels visible. Compare the complete codes and voltage markings rather than relying on diameter, package color, or a partial model number.
Before installation, verify that the model-specific manual, holder markings, and battery specification agree. Use the original photograph to preserve orientation only when it is consistent with those authoritative markings. If the references conflict, stop and obtain model-specific confirmation.
The positive side faces upward in many Ford fobs, but that is not a universal rule. The correct orientation is the one established for the particular holder. General dealership guidance also qualifies positive-side-up as typical and tells owners to match the documented original position. Jim Bass Ford describes the orientation as model-dependent.
Depending on the holder, one edge of the battery may need to slide beneath a retaining tab before the opposite edge presses into place. Apply pressure to the battery, not the circuit board.
Before closing the housing, confirm that the cell:
- Matches the verified code and voltage
- Follows the holder’s polarity markings
- Sits completely flat
- Is retained securely
- Touches the terminals
- Does not wobble or spring out
- Does not obstruct the cover, button membrane, or mechanical-key channel
If the battery will not sit flat, do not press harder. Check for the wrong thickness, reversed orientation, an unengaged retaining lip, remaining packaging material, or an incorrect specification. Do not modify the fob to accept a substitute.
Close the Housing and Test Every Function
Before reassembly, check that the circuit board, button membrane, weather seal, and any other loose component remain seated correctly. Remove only obvious loose debris, and do not disturb terminal grease.
Align the housing halves or battery cover before applying pressure. Make sure clips meet their corresponding slots and that a sliding cover enters its guides squarely.
For a snap-together housing:
- Align the two halves.
- Engage any fixed tabs first.
- Apply gentle, even pressure.
- Work around the perimeter until the clips engage.
- Inspect the full seam.
For a sliding cover, return it along its guides until the latch engages. Do not try to convert its sliding motion into a downward snap.
The closed case should not have unexpected gaps. A gap can allow moisture or dirt into the housing and may indicate that the battery, seal, circuit board, button membrane, or cover has been misaligned. Ford dealership guidance specifically recommends closing the casing without gaps.
Possible causes of a closure problem include:
- The wrong battery thickness
- A battery that is not fully seated
- Incorrect battery orientation
- A displaced seal or button membrane
- A shifted circuit board
- A cover tab outside its slot
- A damaged or folded clip
If the fob has a concealed mechanical key, reinsert it after the housing is secure. Confirm that it locks into place and that the release works normally.
Test the fob systematically:
- Stand near the vehicle and test lock.
- Test unlock.
- Test the trunk or liftgate release, if equipped.
- Test the panic alarm, where practical.
- Test remote start, if equipped and normal operating conditions permit it.
- Test passive entry at the relevant doors.
- Confirm recognition for push-button starting.
- Repeat lock and unlock from a normal operating distance.
Testing each equipped function helps distinguish a general power failure from a worn button or a feature-specific problem.
Compare the result with the original symptom. Check whether normal range has returned, whether the fob responds on the first press, and whether passive recognition is reliable.
If the case will not close, do not force it. Reopen the housing and check the battery code, thickness, seating, orientation, clips, seal, and internal component alignment.
Troubleshoot a Ford Fob That Still Does Not Work
If the fob remains dead or unreliable, use a prioritized sequence rather than jumping immediately to reprogramming.
1. Verify the battery specification. Compare the complete replacement code and voltage with the Owner’s Manual, holder markings, and verified original specification. Check that no clear protective film, insulating tab, or other packaging remains on the cell.
2. Verify polarity. Compare the installation with the holder’s positive and negative markings and your original photograph. If the references conflict, stop and obtain model-specific confirmation rather than testing an uncertain arrangement repeatedly.
3. Check seating and contact. The battery should sit flat, remain firmly retained, and touch the terminals. Inspect for a visibly displaced, corroded, broken, or damaged contact. Do not bend a contact as an improvised repair.
4. Inspect the housing assembly. Look for debris, a trapped seal, a shifted button membrane, a misaligned circuit board, broken clips, or incomplete closure. A case that closes on one side but gapes on the other may leave the battery or buttons out of position.
5. Test near the vehicle. Stand next to the driver’s door and test each button separately. If one control fails while the others work, the problem may be localized to that button. If the buttons work but passive entry or starting does not, the issue may involve vehicle recognition rather than the basic battery connection.
6. Try the spare fob, if available. A working spare can help distinguish a fault in one remote from a broader vehicle-side issue. There is no need to open or modify the spare merely for comparison.
7. Consider non-battery causes. Persistent failure can involve corrosion, water exposure, worn buttons, damaged contacts, circuit-board damage, or a vehicle-side recognition problem. These are possible causes, not a diagnosis that can be confirmed from symptoms alone.
Continued failure does not prove that programming was erased. Ford states that an ordinary battery replacement does not erase the programmed key. Treat programming as a model-specific diagnostic question only after checking the battery type, voltage, polarity, seating, contacts, assembly, and visible condition.
Avoid generic online pairing sequences. A procedure written for one Ford model or fob category may not apply to another. Use the exact Owner’s Manual or obtain qualified assistance instead.
Dispose of the Battery and Know When to Get Help
Keep the removed battery separate from the replacement so it cannot be reinstalled accidentally. Ford directs owners to dispose of used batteries according to local regulations. Use an appropriate battery collection or recycling point where available, and do not place the cell in ordinary household trash where local rules require separate disposal. Ford also advises owners who need assistance to take all their keys to a Ford dealer. These disposal and assistance instructions appear in Ford’s official guidance.
Stop DIY work and seek help if you find:
- A cracked housing
- Broken or missing clips
- A cut, stretched, or displaced weather seal
- Corrosion or evidence of leakage
- Signs of water exposure
- A loose, broken, or displaced contact
- Visible circuit-board damage
- A detached internal component
- A mechanical key or release that no longer works
- A battery that cannot be removed without prying against the circuit board
Professional assistance is also appropriate if the fob cannot be opened or closed safely, the verified battery will not seat naturally, or the vehicle remains unresponsive after the battery type, orientation, seating, contacts, and housing alignment have been checked.
A Ford dealer can compare the fob with model-specific vehicle information and diagnose recognition problems. Bring all available keys when requested so the complete key set can be checked.
Whenever general online instructions conflict with the Owner’s Manual or authoritative markings inside the fob, stop and obtain model-specific confirmation.
What battery does a Ford key fob take?
There is no single battery for every Ford key fob. CR2032, CR2025, and CR2450 appear in guidance for certain fobs, but none is universal. Check the model-specific Owner’s Manual, the complete code on the installed battery, and the holder markings before purchasing a replacement.
Do not rely solely on the vehicle year or a generic compatibility chart. Fob style, trim, part number, and replacement-remote design can affect the requirement.
Will changing a Ford key-fob battery erase its programming?
No, not during an ordinary battery replacement. Ford states that replacing the battery does not erase the key programmed to the vehicle.
If the fob fails afterward, check the battery specification, polarity, seating, contacts, and housing assembly before suspecting programming. Do not use a generic pairing procedure in place of model-specific diagnosis.
Does the positive side of a Ford key-fob battery face up?
It faces up in many Ford fobs, but not all. Follow the holder’s polarity markings and model-specific instructions. Use your photograph of the original battery as supporting evidence only when it agrees with those markings.
If the references conflict, do not guess.
Can I replace a CR2025 with a CR2032 in a Ford key fob?
Not unless the exact fob specification permits it. Both are 20 millimeters in diameter and provide three volts, but a CR2025 is 2.5 millimeters thick while a CR2032 is 3.2 millimeters thick. That difference can affect seating and case closure. See the documented CR2025 and CR2032 dimensions.
Do not force a CR2032 into a holder specified for a CR2025, bend the contacts, or add a conductive spacer. Use the exact cell specified for the fob.
Why does my Ford key fob still not work with a new battery?
Check, in order:
- The complete battery code and voltage
- Any protective film or packaging left on the cell
- Battery polarity
- Flat, secure seating against the terminals
- Debris or displaced internal components
- Correct housing alignment and closure
- Operation of each individual button near the vehicle
If those checks do not solve the problem, possible causes include corrosion, water exposure, worn buttons, damaged contacts, circuit-board damage, or a vehicle-side recognition fault. A working spare fob can help separate a problem with one remote from a vehicle-side issue.
Use this final verify-replace-test checklist:
- Verify: Confirm the Owner’s Manual, battery code, holder markings, voltage, orientation, and required quantity.
- Open: Use only the intended key release, notch, seam, or sliding cover.
- Record: Photograph the installed battery before removing it.
- Replace: Install an exact-match cell without forcing it or modifying the contacts.
- Close: Align the housing and confirm that it closes securely without gaps.
- Test: Check every equipped function near the vehicle and again at a normal distance.
A normal Ford key-fob battery replacement does not erase the programmed key. Cracked parts, corrosion, water damage, damaged contacts, conflicting battery information, or persistent failure after a verified installation justify model-specific professional diagnosis.