
Find the Right Battery and Restore Your Lexus Key Fob
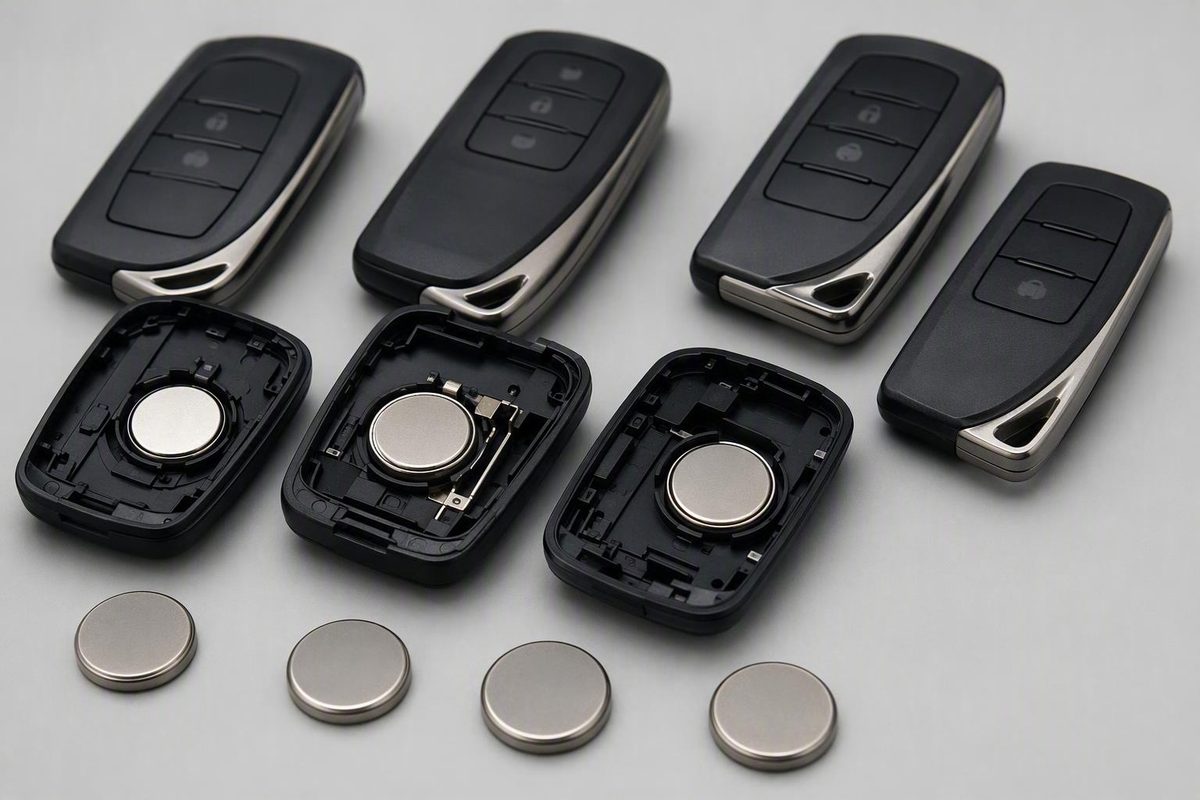
Documented Lexus applications use CR1616, CR1632, CR2016 or CR2032. Verify the installed code and manual, then use case-specific replacement and failure checks.
Quick answer: Which battery does a Lexus key use?
Lexus keys do not all use the same battery. Depending on the model, model year, and key design, documented Lexus applications use CR1616, CR1632, CR2016, or CR2032 coin cells. The official compatibility information covers model years 1998 through 2019, so it cannot establish the correct battery for a 2020-or-newer vehicle.Lexus’s remote-key battery compatibility table documents these four sizes and the years covered.
Before buying a Lexus key battery, verify the required cell in this order:
-
Check the applicable owner’s manual. Use the manual for the exact model and year, then look under Do-it-yourself Maintenance.
-
Read the installed battery. The code—such as CR1632 or CR2032—is normally printed on one face of the coin cell. Photograph it before removal.
For a 2020-or-newer Lexus, use the model-specific manual and the physical key rather than extrapolating from an older vehicle with the same model name.
Be cautious with generic retail listings and dealership articles that prescribe CR2032 without identifying a model, year, market, or key design. Such guidance may be correct for the pictured fob but wrong for yours. The code on the original cell and model-specific Lexus instructions are stronger evidence than a broad product title.
Confirmed Lexus battery sizes and model-year examples
The following is a selected historical reference, not a complete current-model battery finder. It summarizes applications confirmed by Lexus through 2019 and does not cover every regional variation, replacement fob, aftermarket key, or newer vehicle.
| Model year | Models listed with CR1632 | Models listed with CR2032 |
|---|---|---|
| 2019 | GX 460 | All other models listed for 2019 |
| 2018 | GX 460 | All other models listed for 2018 |
| 2017 | CT 200h, GX 460, LS 460 | All other models listed for 2017 |
| 2016 | CT 200h, GX 460, LS 460, LS 600h | All other models listed for 2016 |
| 2015 | CT 200h, GX 460, IS 250 C, IS 350 C, LS 460, LS 600h, LX 570, RX 350, RX 450h | ES 300h, ES 350, GS 350, GS 450h, IS 250, IS 350, NX 200t, NX 300h, RC 350, RC F |
The same Lexus table records several notable exceptions:
- The 2012 LFA uses a CR2016.
- The 2010 SC 430 uses a CR1616.
- The other Lexus models listed for 2010 use CR1632.
- Some older ES, LX, and RX applications use CR2016, depending on model year.
These assignments come from the detailed Lexus model-and-year battery table. They show why a model name alone is not enough: different years of the same model may use different cells, and vehicles from the same year may also have different requirements.
The Lexus support page includes a broad introductory statement suggesting that CR1632 and CR1616 are common in 2010-to-current vehicles. That statement does not align neatly with the detailed table, which assigns CR2032 to many 2013–2019 applications. When a general summary conflicts with a specific model-and-year entry, favor the detailed entry, then verify it against the applicable owner’s manual and the battery actually installed.
Do not use this historical table as proof of fitment for a vehicle newer than 2019. Likewise, do not assume an aftermarket or replacement fob follows the original vehicle specification.
Signs the key battery may be getting weak
A weak Lexus key battery often becomes inconvenient before it fails completely. Possible signs include:
- Locking or unlocking works only from a shorter distance.
- The fob responds intermittently.
- A button must be pressed repeatedly.
- The indicator LED on the key no longer illuminates.
- Smart Access or proximity entry becomes unreliable.
- Push-button starting becomes inconsistent.
- A model-dependent low-key-battery alert appears in the cabin or on the dashboard.
Lexus dealership guidance identifies reduced proximity range, an inactive key LED, Smart Access trouble, push-button-start trouble, and a possible cabin alert as low-battery symptoms.This dealership overview of Lexus key-battery warning signs also advises checking the owner’s manual for the correct cell.
These symptoms suggest a weak battery, but they do not prove that the battery is responsible. Similar behavior can result from:
- A cell that is not seated correctly
- Reversed polarity
- Dirty, corroded, bent, or damaged contacts
- Worn buttons or internal physical damage
-
Water exposure or impact damage
-
A fault elsewhere in the key
If you have two registered keys, compare them under the same conditions.
Location can also matter.
Replacing a correctly identified battery is a sensible first check because it is direct and relatively simple. It is not a guaranteed repair. If a fresh, properly installed battery produces no improvement, continue through the diagnostic checks below instead of experimenting with different cell sizes.
Before opening the fob: identify the battery and case design
Do not purchase a CR2032 merely because it appears frequently in search results. First identify the exact cell required by your key using the owner’s manual, a fob marking, and the battery already installed. If the battery is visible before removal, photograph its printed code and orientation.
Next, determine how the shell is designed to open. Lexus keys are not mechanically identical. Supported examples include:
- Smart Key cases that open after the mechanical or emergency key is removed
- Conventional fobs held together by one or more small screws
- Some sliding cases or panels, although the supplied example is an anecdotal, model- and market-specific owner report rather than a universal Lexus procedure
A Lexus dealership guide distinguishes Smart Key cases opened after removal of the mechanical key from conventional fobs secured by small Phillips screws. An owner report concerning a UK-market 2022 NX 350h describes a sliding design, underscoring the need to inspect the individual fob rather than applying one method to every key.
Inspect the entire shell before using a tool. Look for:
- A mechanical-key release
- A small Phillips screw
- A designated indentation or slot
- A visible seam
- A sliding rear panel
- An arrow or molded opening symbol
Work on a clean, stable, well-lit surface. A tray or light-colored towel can keep the emergency key, screws, battery, and internal module from rolling away. Keep the fob level while opening it so that any removable parts remain in their original positions.
Choose tools according to the case:
- For a designated opening point, use the mechanical key or an appropriately sized small flat tool.
- For a screw-fastened shell, use the correct small Phillips screwdriver.
- For a sliding design, follow the molded release direction instead of prying at the seam.
The goal is to release the shell at its intended opening point, not to lever against the circuit board. Avoid bending the battery-retaining contacts or touching small electronic components unnecessarily.
If the case does not separate with light, controlled pressure, stop and reassess the design. There may be a hidden screw, another latch, or a sliding panel.
Replacement and aftermarket fobs deserve extra caution. Use the identifiers on that fob and the code on its installed battery rather than assuming it has the same internal design as the key originally supplied with the vehicle.
Coin-cell precaution: Keep loose and used coin cells out of children’s reach. If a battery may have been swallowed, obtain emergency medical guidance immediately. Do not place foil or another improvised conductive spacer inside the fob.
How to replace a Lexus key-fob battery
The following procedure describes a common Lexus Smart Key. It is not a universal disassembly guide. For the definitive process, consult the Do-it-yourself Maintenance section of the owner’s manual for the exact model and year.
1. Remove the mechanical key
Find the release button or slider on the side or rear of the fob. Hold it in the released position while pulling out the mechanical or emergency key.
Do not force the blade. If it does not move, confirm that the release is fully engaged and that you are pulling in the intended direction.
2. Locate the intended opening point
With the mechanical key removed, inspect the exposed area for a slot or indentation. Some Smart Key designs allow the flat end of the mechanical key to be inserted there and twisted gently. An appropriately sized flat tool may be used when the design specifically provides a pry point.
Apply only enough pressure to release the retaining clips. If necessary, work gradually around the seam instead of forcing one corner far apart. If the fob has screws or a sliding cover, follow that design rather than these pry-open steps.
3. Record the internal arrangement
Lift the case half carefully and observe how the electronic module sits inside. Some designs place the battery directly in view; others position an electronic key module over it.
Before moving anything, take a clear photograph showing:
- The old battery code
- Which battery face is visible
- The direction of the positive symbol
- The position of the electronic module
- The location of any rubber button pad or loose insert
If a module covers the battery, lift it only as the design permits. Do not pull on attached parts or pry against the circuit board.
4. Verify the old battery code
Read the designation printed on the installed cell. It should match the replacement you obtained. For example, CR1632 should be replaced with CR1632, not with a cell selected merely because it has a similar diameter or the same nominal voltage.
If the printing is obscured, check the battery compartment for a molded designation and consult the applicable manual. If the old cell is unmarked, damaged, or clearly the wrong fit, obtain model-specific confirmation before continuing.
5. Remove the old cell gently
Release the battery from its holder without bending the retaining contacts. Use the intended access notch if one is present. A small non-marring tool may provide better control than a metal screwdriver used close to the circuit board.
Observe whether one edge of the cell sits beneath a fixed tab before the opposite edge snaps under a spring contact. You will need to reproduce that arrangement during installation.
6. Install an identical fresh cell
Several Lexus dealership guides show the replacement battery installed with the positive side facing up in the fobs they describe. However, those guides also acknowledge that procedures vary by model and year.North Park Lexus’s Smart Key replacement guide illustrates this common orientation and opening method.
Do not treat positive-side-up as universal. Reproduce the orientation shown by:
- Your pre-removal photograph
- The original cell position
- A polarity marking in the battery compartment
- The model-specific owner’s manual
Slide the cell beneath any fixed retaining edge, then press it flat into position. It should sit securely and evenly. Never bend a contact to make an incorrect or thinner battery fit.
7. Restore the module and close the shell
Return the electronic module, button membrane, and any insert to their original positions. Confirm that nothing overlaps the case seam and that the battery remains flat.
Align the shell halves and press around the perimeter with even pressure. The clips should engage without excessive force. If the case will not close, reopen it and check for:
- A displaced electronic module
- A battery sitting above its holder
- A pinched rubber button pad
- A misaligned mechanical-key channel
- An incorrectly sized battery
For a screw-type case, reinstall the screws without overtightening them. Finally, slide the mechanical key back into its storage channel until it locks.
8. Test every relevant function
Do not stop after testing one button. Check all functions fitted to the vehicle:
- Lock
- Unlock
- Trunk or liftgate release
- Panic button
- Key indicator LED
- Proximity entry
- Touch-to-lock
- Push-button starting
Test at close range first, then check whether normal operating range has returned. If a button works only when pressed at an angle or with unusual force, the problem may involve the button pad or internal alignment rather than battery power.
Why a new battery may not fix the key
If the fob still does not work, do not immediately conclude that it requires programming or replacement. Check the installation in a controlled order.
1. Confirm the battery code
Compare the new cell with the removed battery and the specified type. Every character matters. Similar-looking coin cells are not necessarily the same size.
If you relied on a generic product listing, reopen the key and read the original designation or compartment marking.
2. Recheck polarity
Compare the new cell’s orientation with your photograph, the original position, the compartment marking, or the manual.
3. Verify seating
Make sure the battery lies flat and reaches the required contacts. One edge may need to slide beneath a retaining tab before the other is pressed down.
Check whether the module, rubber pad, or shell is lifting the battery away from its contacts. If the case becomes unusually difficult to close, do not force it.
4. Remove packaging or protective material
Inspect the replacement cell for a sticker, insulating tab, or protective film left from its packaging.
5. Inspect the contacts
Look for dirt, corrosion, bent tabs, or a contact displaced during removal. Do not scrape aggressively or pour cleaning liquid into the fob. The circuit board and small contacts are easy to damage, and a visibly corroded or water-damaged key may require professional inspection.
6. Try another fresh battery of the same code
A newly purchased cell is not necessarily in good condition. If its age, storage history, or condition is uncertain, try another fresh battery with the same designation. Do not substitute a different thickness as a diagnostic shortcut.
7. Inspect the fob for physical damage
Look for:
- Cracks in the shell
- Missing or worn button material
- Water residue
- Corrosion
- Loose internal parts
- Evidence of a drop or impact
- A circuit module pinched by the case
- Retaining clips that no longer secure the shell
A battery can restore power, but it cannot repair a damaged switch, cracked component, or broken internal connection.
8. Compare the second key
If another registered key works normally, the problem is more likely inside the affected fob. If both keys fail in the same way, environmental interference or a vehicle-side problem becomes more plausible.
This comparison also helps prevent unnecessary replacement. A vehicle that recognizes neither properly powered key requires a different diagnostic path from one unresponsive remote.
9. Seek model-specific diagnosis
Dealership replacement guidance recommends testing after installation and seeking further evaluation when a correct battery change does not restore operation.Lexus of Palm Beach’s battery guide does not present continued failure as proof that one particular repair is required.
Do not assume that the key automatically needs programming, a new circuit board, or complete replacement. The next step depends on the model, symptoms, whether another registered key works, and whether the vehicle recognizes the affected fob at all.
CR2025 versus CR2032: why the numbers matter
CR2025 and CR2032 are both nominal 3-volt lithium coin cells with a 20 mm diameter, but they differ in thickness:
- CR2025: 2.5 mm thick
- CR2032: 3.2 mm thick
The first numeric pair indicates diameter in millimeters, while the final pair indicates thickness in tenths of a millimeter. Thus, “20” means a 20 mm diameter, “25” means 2.5 mm thick, and “32” means 3.2 mm thick. The thicker CR2032 generally offers greater capacity, although actual service life depends on the device and the particular battery.This CR2025 and CR2032 dimensional comparison documents their voltage, diameter, thickness, and code format.
The 0.7 mm thickness difference can matter inside a closely fitted key:
Do not treat the batteries as automatically interchangeable. Use the code on the removed battery, the fob marking, or the model-specific manual. Similar appearance is not proof of compatibility, and an improvised spacer is not an appropriate substitute for the specified cell.
Battery life, storage, and optional power-saving features
Lexus dealership guidance commonly estimates key-fob battery life at approximately one to two years, but this is a general estimate rather than a guaranteed replacement interval.Lexus of Portland’s key-battery guidance presents that range as an estimate.
Actual service life can vary with:
- The fob and vehicle design
- How frequently the key is used
- Proximity and passive-entry activity
- Storage conditions
- The condition and freshness of the installed cell
- How long the battery was stored before installation
- Unintentional button presses
A fixed annual replacement schedule is therefore unnecessary for every owner. A verified low-battery warning, declining range, intermittent operation, or inactive key LED provides a more useful reason to inspect the battery than the calendar alone. For additional general context, see this overview of key-fob battery lifespan and warning signs.
Some dealership guidance describes a battery-saving mode for certain Lexus keys, but the available evidence does not establish universal model support or one activation sequence. An anecdotal owner report also describes a different sequence. Consult the applicable owner’s manual before attempting to enable or disable a power-saving feature.
If you keep a spare battery, label it with the cell code and monitor its age and package condition. Keep it in its original packaging and away from children. Do not mix loose cells of different codes, because similarly sized CR-series batteries can be difficult to distinguish without reading their markings.
Reprogramming, emergency use, and when to seek service
The available evidence does not support a universal promise that every Lexus key will—or will not—require reprogramming after a battery change. A simple battery replacement does not itself prove that pairing has been lost.
If a properly powered key remains unrecognized:
- Consult the owner’s manual for model-specific recognition or resynchronization instructions.
- Compare a second registered key, if available.
- Confirm whether the vehicle responds normally to that second key.
- Obtain Lexus or qualified key-service diagnosis if the problem persists.
Do not perform an unrelated internet “reset” sequence unless it is documented for the exact model. Instructions intended for another Lexus generation or another manufacturer may be irrelevant.
One dealership guide says a Lexus can usually be started with a depleted fob battery by holding the fob near the start button.The dealership’s emergency-use guidance is secondary and non-universal, so it should not replace the vehicle’s owner’s manual.
Seek model-specific assistance when:
- The case will not open through gentle use of its intended mechanism.
- You cannot identify the original battery code.
- The fob is aftermarket, unfamiliar, or internally modified.
- The shell, contacts, buttons, or circuit board appear damaged.
- There are signs of water exposure or corrosion.
- Both registered keys fail.
- A correctly identified fresh battery does not restore operation.
- The vehicle still does not recognize a properly powered key.
Frequently asked questions
What battery does a Lexus key fob take?
It depends on the model, model year, and key design. Documented Lexus applications include CR1616, CR1632, CR2016, and CR2032. Check the owner’s manual, the fob marking, and the code printed on the installed cell before buying a replacement. For newer vehicles not covered by the historical Lexus table, use current model-specific instructions.
Does every Lexus key use a CR2032 battery?
No. Although CR2032 appears in many Lexus applications and generic replacement guides, other documented keys use CR1616, CR1632, or CR2016. Verify the exact fob rather than relying on a universal product listing.
Which side of a Lexus key battery faces up?
Many dealership guides show the positive, “+” side facing up in the fobs they describe, but that orientation has not been established for every Lexus key design. Photograph the old cell before removal and follow the original position, the compartment polarity marking, or the model-specific manual.
Does a Lexus key need reprogramming after its battery is changed?
There is no universal answer supported for every Lexus key. First verify the battery code, polarity, seating, and contact. If the properly powered fob remains unrecognized, consult the vehicle’s owner’s manual for model-specific instructions rather than assuming that reprogramming is either always required or never required.
Why is my Lexus key fob still not working with a new battery?
The battery may be the wrong code, reversed, loose, blocked by protective material, or inadequately connected to the contacts. The cell itself may also be weak, or the fob may have corrosion, water exposure, worn buttons, impact damage, or a displaced internal module. If both registered keys fail, interference or a vehicle-side problem becomes more plausible.
Final verification checklist
Use a verification-first process:
- Identify the exact Lexus model, year, market, and fob.
- Confirm the installed battery code.
- Photograph and preserve the original orientation.
- Identify the correct pry-open, screw-fastened, or sliding case design.
- Open the shell gently at its intended point.
- Install an identical fresh cell and seat it flat.
- Reassemble the case without forcing it.
- Test every relevant remote, proximity-entry, and starting function.
If those steps do not restore operation, stop treating the problem as a simple battery failure. Consult the applicable owner’s manual and obtain qualified, model-specific diagnosis.