
Change Your Prius Key Fob Battery Without Damaging It
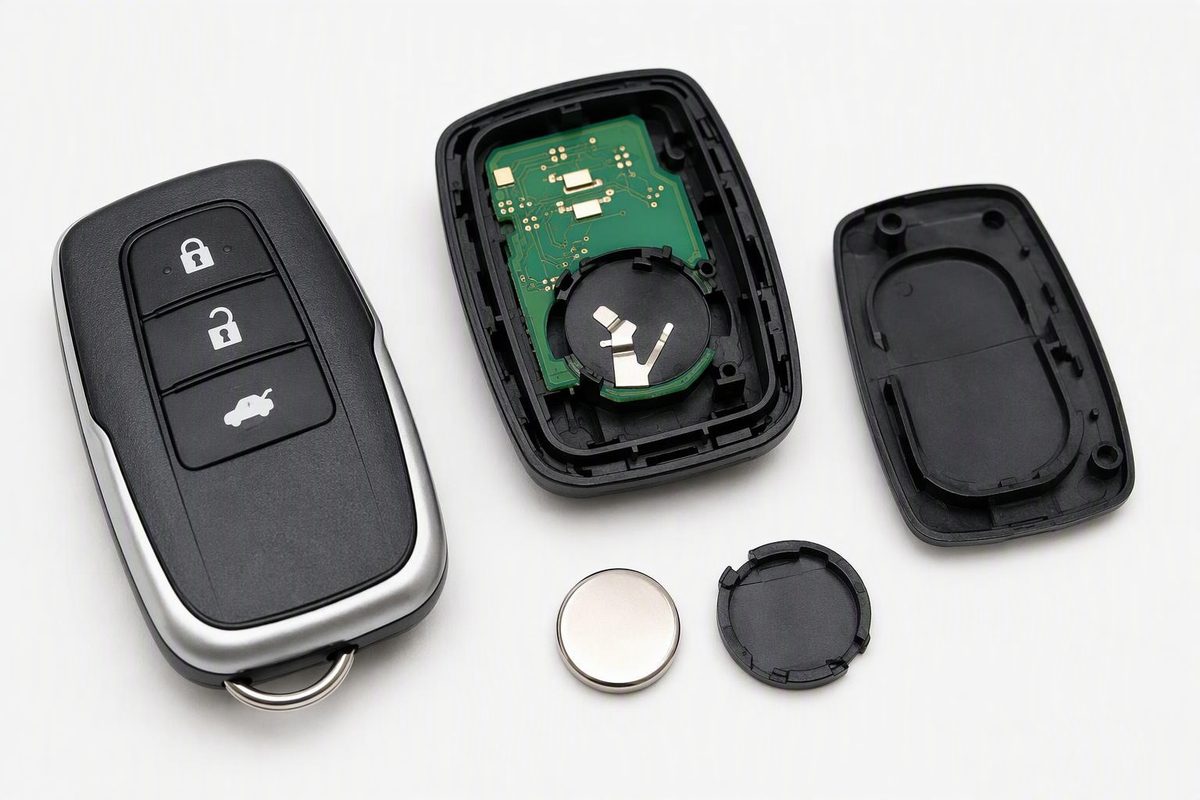
Find the correct Prius key-fob coin cell, open the case safely, install it with proper polarity, and troubleshoot a remote that stays dead.
To replace the battery in a Prius key fob, first match the coin cell to the exact model year and fob, remove the mechanical key, open the case at its intended slot, and install the new cell with the correct polarity. Toyota specifies CR1632 for the 2010 Prius, CR2032 for the 2016 Prius and CR2450 for the 2023 Prius in the cited U.S. manuals, but those examples do not establish the correct battery for every Prius variant or year.
Choose one of the documented Prius model years; use the exact manual for any year or variant not listed.
Prius Key-Fob Battery Check
This lookup covers only the three standard Prius examples documented below.
2010 Prius
CR1632Install with the “+” terminal facing up.
- 2010CR1632+ side up
- 2016CR2032+ side up
- 2023CR2450+ side up
Source: U.S.-market Toyota owner’s manuals for the 2010, 2016 and 2023 Prius. Prius c, Prius v, Prius Prime and other years are not established by these examples.
Confirm the Exact Coin Cell
Do not buy a battery based only on the word “Prius.” Toyota has used different coin cells across Prius generations, while Prius c, Prius v and Prius Prime models can have different instructions from the standard Prius.
The 2010 Prius manual, 2016 Prius manual and 2023 Prius manual specify CR1632, CR2032 and CR2450 respectively. Each of these U.S.-market manuals directs the owner to install the cell with the positive terminal facing up.
Use the vehicle’s model year—not merely its registration date or appearance—and its full model name. Verify the battery in at least one of these places:
- The “Electronic key battery” section of the correct owner’s manual.
- The complete code printed on the installed coin cell.
- The battery specification associated with the exact replacement fob, if the original fob was previously replaced.
The letters and all four digits matter. CR1632, CR2032 and CR2450 are all 3-volt lithium coin cells, but they are not interchangeable. If the manual and installed battery disagree, stop and confirm that you have the correct manual and that the fob belongs to the vehicle.
Gather the Battery and Opening Tool
You need the exact replacement coin cell, a small flathead screwdriver or plastic opening tool, a thin cloth or tape to protect the case, and a clean, dry work surface.
Keep new and removed cells away from children. Toyota’s 2023 manual warns that a swallowed coin or button battery can cause severe chemical burns in as little as two hours. It advises getting emergency medical attention immediately if a battery is swallowed or placed inside any part of the body.
Replace the Prius Smart-Key Battery
This sequence applies to the removable-mechanical-key designs documented in the three cited Prius manuals. If your fob does not match the description, do not force it open; follow the instructions for that specific fob.
- Turn the vehicle off. Work over a table so the mechanical key, battery and case pieces cannot fall into a seat gap or onto the pavement.
- Remove the mechanical key. Slide the release on the fob while pulling out the hidden metal key.
- Open the case at its intended slot. Cover the tip of a small flathead screwdriver with a thin cloth. Place it in the opening point near the mechanical-key cavity and twist gently. Do not push the tool far enough to contact the circuit board.
- Lift the cover carefully. The electronic module may remain attached to the upper cover. Toyota notes this possibility in its 2016 and 2023 instructions; support the module rather than pulling on it.
- Record the old battery. Read its complete code and note which face is up. Take a photo before removal if the arrangement is not obvious.
- Remove the depleted cell. Use a suitably sized small screwdriver at the holder’s access edge. Avoid bending the retaining contacts.
- Install the exact replacement. For the 2010, 2016 and 2023 fobs documented here, Toyota specifies the “+” terminal facing up. Follow the correct manual if your fob is different.
- Close the case without force. Seat the module correctly, align both halves and press around the perimeter until the clips close. Reinsert the mechanical key.
- Test every function. Check each fitted button, passive entry if equipped, and whether the vehicle reaches READY mode.
Toyota’s cited battery-replacement procedures do not include a programming or registration step. After a routine battery change, check the cell, polarity and assembly before attempting an unsupported reset procedure.
Check the Installation If the Fob Stays Dead
Confirm that the cell’s complete code matches the manual or original battery. Then verify that its positive side faces the specified direction and that the cell sits beneath the retaining tabs.
Inspect the electronic module and battery contacts. A module that shifted while the case was open, a bent contact or a case that has not fully closed can prevent normal operation. If the replacement battery’s condition is uncertain, test with another fresh cell of the verified type.
Test the spare fob when one is available. If the spare operates normally, the fault is likely limited to the first fob rather than the vehicle’s entire keyless-entry system.
Toyota says a depleted electronic-key battery can reduce operating range and prevent the smart-key system or wireless remote from working properly. The mechanical key remains the physical fallback for door entry and does not rely on the coin cell.
Starting authorization is a separate function. Prius manuals provide an emergency procedure for operating the vehicle when the electronic key is not working normally. Use the procedure in the manual for your exact model and year rather than a generic internet reset.
If neither fob works, the vehicle’s 12-volt battery is weak, or a correctly assembled fob with a verified fresh cell is still not recognized, stop replacing coin cells. The next step is diagnosis of the fob, vehicle-side system or key registration. For help separating those faults, see Key Fob or Keyless Entry Remote? Identify, Test and Replace It.