
Find Both Batteries in a Dodge Journey
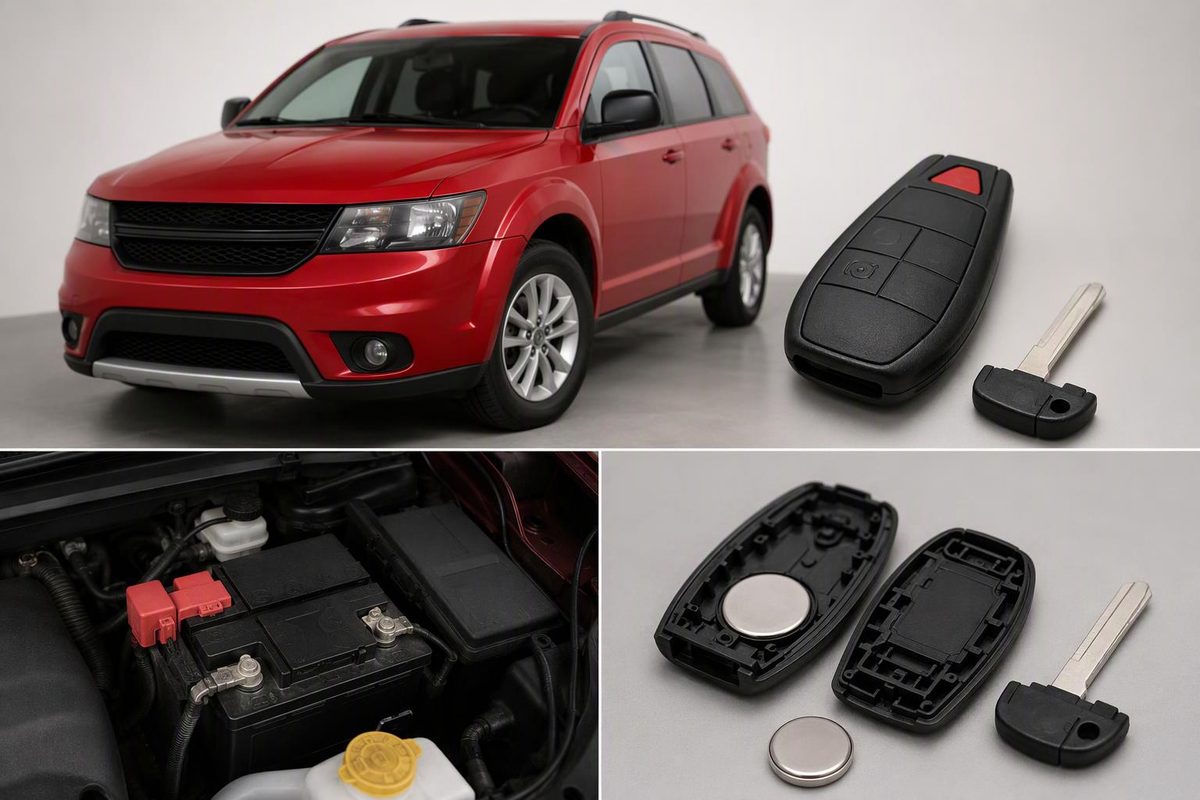
Find the Dodge Journey vehicle battery, remote jump posts and key-fob CR2032, with model-year limits, access steps and practical safety checks.
A Dodge Journey’s 12-volt vehicle battery is low on the driver’s side, between the left-front headlight and the left-front wheel-well splash shield, on documented 2011–2020 models. It is accessed through the wheel-well area rather than from the top of the engine compartment. The key-fob battery is inside the remote; Dodge specifies one CR2032 coin cell for the documented 2016 and 2018 fobs.
The correct location therefore depends on which battery you mean. A no-crank condition, dim lights or dead accessories makes the vehicle battery and charging system worth checking. Short remote range or intermittent button operation points more toward the key-fob battery.
Choose the model year and job to see the documented location and access route.
Dodge Journey Battery Finder
2018 · Jump-starting
Use the remote posts under the hood
The designated positive and negative posts are on the left side of the engine compartment. The positive post is under a cap; the actual battery remains behind the left-front wheel-well area.
Factory-manual evidence covers this location and jump procedure for 2018.
Sources: Dodge 2016 and 2018 owner manuals; Haynes 2011–2020 battery-access guide. CR2032 is documented here only for 2016 and 2018 fobs.
The Vehicle Battery Is Behind the Left-Front Wheel-Well Liner
On the documented Journey layout, the 12-volt starting battery is not openly accessible from above under the hood. Dodge’s 2016 and 2018 owner manuals place it between the left-front headlight assembly and the left-front wheel splash shield. Haynes describes the same general position as behind the driver-side front wheel well on 2011–2020 models and says that access requires wheel and panel removal.
These sources establish the location for the model years they cover, not for every vehicle carrying the Journey name. The factory descriptions are from the 2016 Journey Owner’s Manual and 2018 Journey Owner Manual. The broader 2011–2020 access description comes from Haynes.
Opening the hood and not seeing a conventional battery tray is therefore normal on these Journeys. The terminals visible in the engine compartment are remote jump-start posts. They provide an accessible connection point without requiring wheel-well access, but they are not a second vehicle battery.
| What You Find | Location | What It Is For |
|---|---|---|
| Starting battery | Behind left-front wheel-well area | Starting and vehicle electrical power |
| Positive post with cap | Left side of engine compartment | Positive jump-start connection |
| Designated negative post | Left side of engine compartment | Final negative jump-start connection |
| Coin cell | Inside the key fob | Remote functions |
The left-front location is described from the driver’s position. The starting battery sits between the headlight assembly and splash shield rather than directly beneath a removable under-hood cover.
Use the Under-Hood Posts for a Jump-Start
If the immediate job is jump-starting rather than replacing the battery, use the designated positive and negative posts on the left side of the engine compartment. Do not try to reach the battery through the wheel well merely to attach jumper cables.
The remote positive post is beneath a protective cap. Dodge gives this connection order:
- Connect the positive cable clamp to the Journey’s remote positive post.
- Connect the other positive clamp to the booster battery.
- Connect the negative clamp to the booster battery.
- Connect the remaining negative clamp to the Journey’s designated remote negative post.
The last connection is specifically made at the designated remote negative post. Dodge warns against attaching that final clamp directly to the discharged battery’s negative terminal. The manual also says not to use a booster source above 12 volts and not to jump-start a frozen battery.
Those instructions describe the documented 2018 procedure. Before connecting cables, confirm the procedure and post locations in the manual for the Journey’s exact model year. A similar-looking terminal or nearby metal component should not be assumed to be the designated connection point.
A successful jump-start establishes that an external source supplied enough power to start the vehicle. It does not, by itself, identify why the battery was discharged. If the Journey repeatedly needs jump-starts, Dodge advises having both the battery and charging system inspected. Replacing the battery alone may not correct a charging problem, cable problem or parasitic drain.
The symptom also matters. A no-crank condition accompanied by dim lights or dead accessories makes the 12-volt battery and related vehicle systems more relevant than the coin cell in the remote. The key-fob battery operates the remote; changing it is not the documented remedy for a discharged vehicle battery.
Vehicle-Battery Replacement Requires Wheel-Well Access
Replacing the starting battery is more involved than replacing a battery mounted openly under the hood. On the documented 2011–2020 layout, access requires lifting the vehicle and removing the wheel and the relevant wheel-well panel or liner.
That access route changes the practical decision. Finding the battery does not mean it can safely be removed with the vehicle sitting unsupported or with improvised lifting equipment. Stop and use a repair shop if you do not have all of the following:
- A flat, solid working surface
- Correct lifting and jack-stand equipment
- The model-year repair procedure and lug-nut torque specification
- A safe way to support and maneuver a heavy battery through a confined opening
The draft source material does not provide a universal lug-nut torque figure, battery group number or electrical rating for every Journey covered by the location description. Those specifications should not be guessed or borrowed from a different model year or engine.
Do not buy a replacement battery solely by the Dodge Journey name. Match the group size, terminal arrangement and electrical ratings specified for the vehicle’s model year and engine. A battery that fits the opening still needs the correct terminal arrangement and required electrical specification.
The remote posts under the hood can make it appear that the battery should be nearby or beneath them. Their purpose in the documented procedure is to provide jump-start connections. The actual battery remains behind the left-front wheel-well area and requires the separate access procedure described above.
If replacement is being considered after repeated discharges, diagnosis and replacement are separate decisions. The vehicle battery may need replacement, but the surviving source material does not provide a test result, voltage threshold or service life that proves replacement is required. A charging, cable or parasitic-drain problem can leave a replacement battery discharged as well.
The Key-Fob Battery Is Inside the Removable-Key Remote
For the documented 2016 and 2018 Dodge Journey key fobs, the battery is one CR2032 coin cell inside the remote housing. This is a separate battery from the vehicle’s 12-volt starting battery and can be reached without accessing the wheel well.
Dodge’s procedure begins with the emergency key:
- Slide the latch on the back of the fob.
- Pull the emergency key out of the housing.
- Place the key tip or a No. 2 flat-blade screwdriver in the case slot.
- Separate the housing halves gently.
- Note the old coin cell’s orientation before removing it.
- Install the replacement with the markings aligned correctly.
- Snap the housing closed and reinstall the emergency key.
On the documented fob, the battery’s + marking aligns with the + marking inside the battery clip. Dodge also says to preserve the seal and avoid touching the circuit-board or housing contacts.
After closing the case, test lock, unlock and panic. Test remote start as well if the fob is equipped with that function. If the controls operate normally, no further battery-related step is indicated by the cited owner-manual procedure.
The CR2032 specification here is documented for the 2016 and 2018 Journey fobs. It should not automatically be extended to every model year, aftermarket remote or replacement housing. For another year or a fob with a different case, read the code printed on the installed cell before buying the replacement. The same verify-before-opening approach is covered in the general key-fob battery guide.
Do not substitute the visible size or shape for the printed battery code. The surviving sources identify CR2032 for two documented model years but do not provide a complete year-by-year fob-battery table for the entire Journey range.
A Coin-Cell Change Does Not Normally Mean Reprogramming
A straightforward key-fob battery change should not be confused with programming an additional or replacement key. Dodge’s 2018 manual says additional key-fob programming may be performed by an authorized dealer. It does not give a programming step after an ordinary battery change.
That distinction prevents two separate jobs from being treated as one. Opening the existing remote, replacing its coin cell in the documented orientation and closing the same housing is a battery service. Adding another key fob or replacing the remote itself is a programming question.
If a fresh, correctly oriented cell produces no improvement, test a spare fob before paying for programming. A working spare points away from a vehicle-wide receiver problem and toward the original remote, although it does not identify the exact failed part. If neither remote works, the available facts do not establish that both coin cells are bad.
A nonworking remote after battery replacement can involve the coin cell, its orientation, the remote’s contacts, the remote electronics or the vehicle’s receiver. The source material does not provide a single test that separates all of those possibilities. Reopen the housing only if necessary, confirm that the battery code and orientation are correct, and check that the case is fully closed without disturbing the seal or contacts.
Match the Symptom to the Correct Battery
The vehicle battery and key-fob battery can both be described as a “Dodge Journey battery,” but their symptoms and access routes do not overlap.
| Symptom or Job | Battery to Check | Access Point |
|---|---|---|
| No crank, dim lights or dead accessories | 12-volt vehicle battery and charging system | Remote posts for jumping; wheel well for replacement |
| Short remote range | Key-fob coin cell | Inside remote housing |
| Intermittent fob buttons | Key-fob coin cell or remote | Inside remote housing |
| Repeated jump-starts | Vehicle battery plus charging system | Inspection required |
A key fob with poor range does not direct you to the wheel well. A Journey with dead accessories does not direct you to the CR2032. Start with the affected function, then use the corresponding access point.
For documented 2011–2020 models, the physical starting-battery location is behind the driver-side front wheel-well area. For a jump-start, the accessible connection points are under the hood on the left side. For documented 2016 and 2018 remotes, the fob contains one CR2032 with its positive marking aligned to the positive marking in the clip.