
Change Your Toyota Key Fob Battery Without Guessing the Size or Polarity
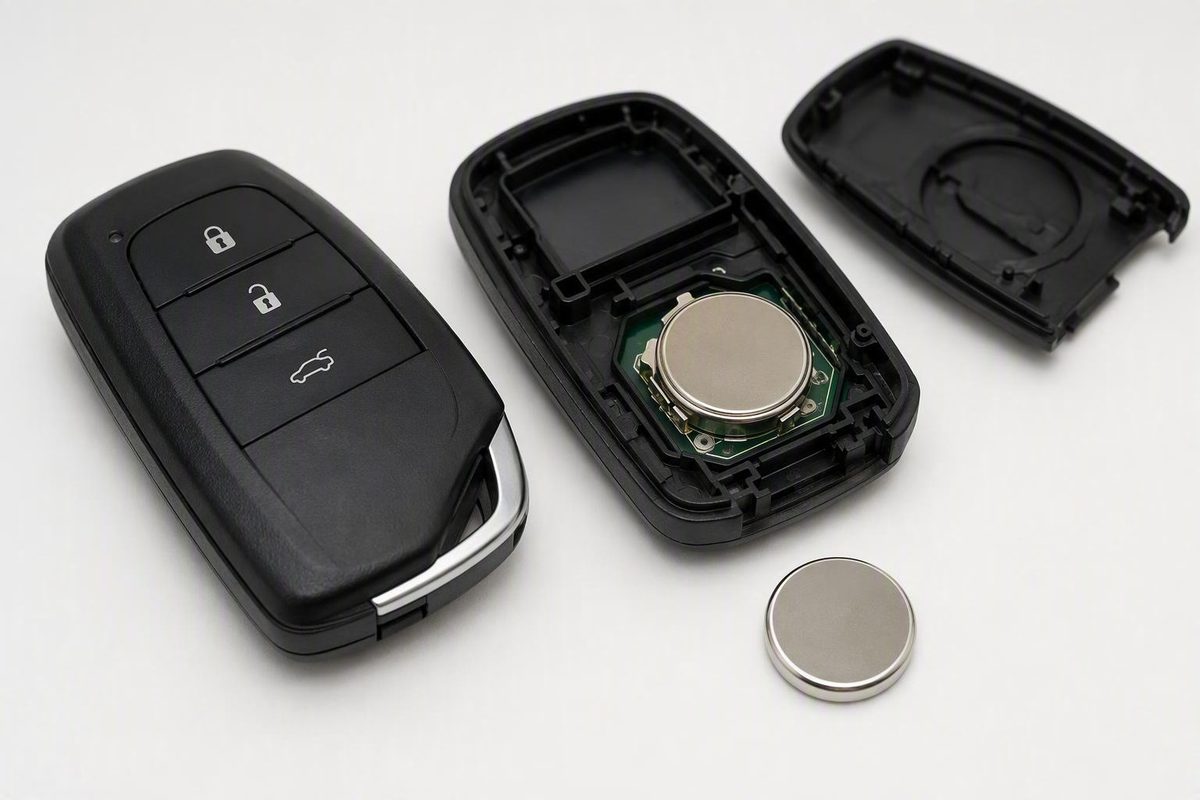
Open the designated slot or seam notch, photograph the installed cell, then match its complete code and orientation instead of assuming CR2032.
To replace a Toyota key-fob battery, open the case at its designated slot or seam notch, photograph the installed battery, and replace it with a coin cell bearing the same code and installed in the same orientation. Toyota fobs vary, so do not assume that every one uses a CR2032, opens the same way, or has the positive side facing up.
Toyota key-fob battery replacement: the quick steps
- Remove the hidden mechanical key, if present. Use the fob’s release control rather than pulling the key out by force.
- Find the designated opening point. Look for a slot exposed after removing the mechanical key or a defined notch along the case seam.
- Open the shell gently. If the slot is designed for the removed mechanical key, place the key tip in it and turn gently. Otherwise, use the opening method indicated by the shell.
- Photograph the installed battery. Capture the complete stamped code and which side faces outward before removing the cell.
- Access the battery. It may be visible beneath the cover, or you may need to lift the circuit board gently.
- Install an identical battery. Match the complete code and copy the old battery’s orientation.
- Close the fob evenly. Return any moved components to their original positions, align the shell halves, and press around the perimeter until the case closes.
- Reinsert the mechanical key and test the remote. Try lock, unlock, and the other buttons present on the fob.
The important distinction is between controlled opening pressure and force. Work at the apparent slot or notch rather than prying randomly around the circuit board, battery contacts, or retaining clips. If the shell does not begin to separate, stop and inspect it again instead of applying substantially more pressure.
Identify the battery instead of assuming it is a CR2032
A Toyota dealership guide says most Toyota models use a CR2032, but that is a general observation rather than a universal compatibility rule. The primary identifier should be the complete code stamped on the battery already installed in the fob. Toyota of Glendale’s replacement guide describes this identification process.
Before removing the old cell:
- Read the complete stamped code.
- Photograph the code while the battery remains installed.
- Record which face points outward.
- Buy a replacement bearing the same code.
Visual similarity is not enough. Generic key-fob guidance identifies CR2025 and CR2450 among the alternatives used in some fobs, reinforcing the need to check the existing cell instead of choosing by appearance. See the generic coin-cell identification guidance.
If the old battery is missing, unreadable, or clearly unsuitable, consult the owner’s manual or other documentation for the exact Toyota model and model year. Do not rely on a general compatibility claim covering “Toyota keys,” because battery requirements can vary by model, year, and fob design.
Choose the opening method that matches your fob
Inspect the shell before inserting anything into it. The intended opening point should look deliberate: either a slot associated with the removable mechanical key or a defined notch along the case seam.
| What you see | Opening method |
|---|---|
| Fob with a removable hidden key | Release and remove the mechanical key. When the slot is designed for it, insert the key tip and turn gently to begin separating the shell. |
| Case with a visible seam notch | Place a thin, sturdy object in the notch and apply light, controlled pressure until the shell begins to separate. |
The exact key release, slot, and notch locations vary by fob design. Let the physical shell determine the method rather than assuming that every Toyota fob of a particular age opens in the same way.
Keep the opening tool at the intended point and avoid inserting it deeply into the case. Once the shell starts to open, separate the halves gradually instead of twisting one side far ahead of the other.
If the circuit board covers the battery, note how the board sits before moving it. Lift it only as much as necessary to expose the cell, without pressing on its small components. A photograph can help you return the board and surrounding pieces to their original positions.
Install the new battery and reassemble the fob
Remove the old battery only after recording its code and installed orientation. Ease it out of the holder without forcing the retaining edges or battery contacts.
Install the replacement so that:
- Its complete code matches the removed cell.
- Its positive side has the same orientation as before.
- The cell sits fully within its holder or retaining edges.
- The battery contacts touch the appropriate surfaces of the cell.
Do not follow a blanket instruction saying the positive side must always face up. Orientation depends on the fob’s internal design, and “up” becomes ambiguous when the case is turned over during the repair. Copy the original installation instead.
If you moved the circuit board, return it to its original position and confirm that it lies flat. Check that the button pad and other internal pieces remain correctly positioned. Align the shell halves, then press around the perimeter so the case closes evenly rather than forcing one misaligned end shut.
Reinsert the hidden mechanical key when applicable. Stand near the vehicle for the first test, then try lock, unlock, and any other remote buttons available on that particular fob.
If the Toyota key fob still does not work
A failed first test does not automatically mean that the fob needs replacement or programming. Reopen it, check the installation one item at a time, and test again after each correction.
| Check | Action |
|---|---|
| Wrong battery code | Compare the new cell’s complete code with the old battery or your photograph. |
| Reversed polarity | Restore the battery to its original orientation. |
| Loose battery | Reseat it fully beneath the holder or retaining edges. |
| Poor contact | Confirm that the contacts are clean and touching the cell. |
| Open or misaligned case | Realign the shell and snap it fully closed. |
| Continued failure | Consult model-specific documentation or seek professional diagnosis. |
Generic guidance says most key fobs do not require reprogramming solely because the battery was changed, but that does not rule out Toyota model-specific synchronization or programming procedures. Check the owner’s manual for the exact model and year before attempting a generic reset sequence. Key Fob Zone explains the general reprogramming guidance and its exceptions.
If the battery code, polarity, seating, contacts, and case closure are correct but the remote remains unresponsive, several explanations are possible. The battery change alone cannot establish which cause is responsible.
Consult the model-year owner’s manual when the opening method or post-replacement procedure remains unclear. For a persistent fault, an automotive locksmith, Toyota dealer, or other qualified automotive-key professional can provide model-specific diagnosis.
How long does a Toyota key-fob battery usually last?
Three to four years is a general estimate, not a guaranteed replacement interval. Actual battery life varies with the fob and its use. Inspect or replace the battery when the remote becomes weak or unresponsive rather than relying solely on its age. Toyota of Glendale gives the three-to-four-year estimate.
The no-guesswork rule is simple: use the opening point intended for the fob, match the old battery’s exact code and orientation, and retest after checking its seating and contacts. If those checks do not restore operation, move to model-specific documentation or professional diagnosis instead of assuming that another new battery will solve the problem.