
How to Change Your Buick Key Fob Battery Without Guessing
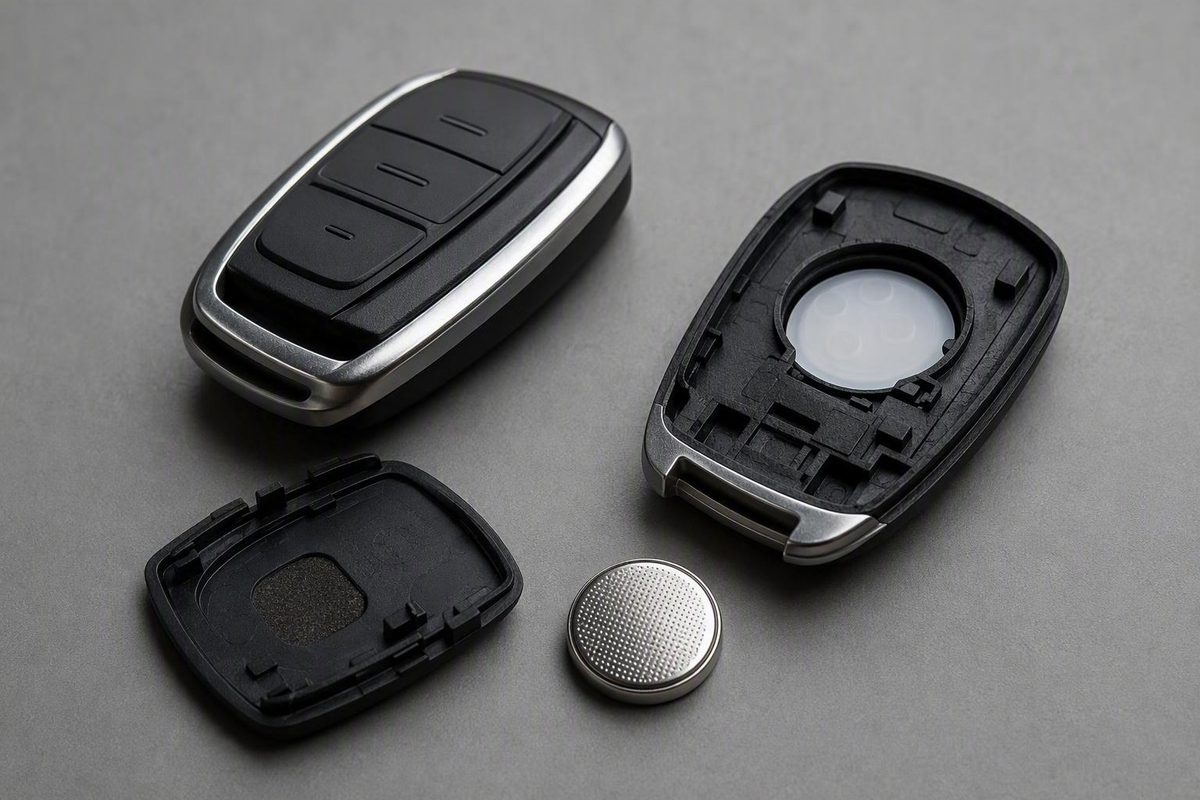
A CR2032 is common but not confirmed for every Buick. Match the old cell's full number, photograph its orientation, then replace and test before programming.
A Buick key fob battery replacement is often manageable at home. The challenge is not simply removing a coin cell; it is confirming the correct battery, preserving its polarity, finding the intended opening point, and avoiding an unnecessary programming attempt.
Buick has used different fobs across its models and years. Third-party dealership instructions describe several common designs, but they do not establish one official procedure for every Buick transmitter. Treat this as a general workflow, then use the installed battery and the owner manual for your exact model year as the primary references.
The safest sequence is straightforward: verify the battery number, photograph the original orientation, open the housing only at an apparent seam or notch, install the matching cell in the same position, close the case completely, and test the existing fob before considering synchronization or programming.
Coin-cell safety: Keep new and used batteries secured and away from children and pets. Do not leave a removed cell loose on the work surface. Follow the safety, emergency, storage, and disposal directions printed on the battery packaging. If ingestion is suspected, follow the package’s emergency instructions and seek immediate medical help.
Confirm That the Battery Is the Likely Problem
A weakening fob battery often causes declining performance before the remote stops working completely. Common signs include:
- Reduced operating range
- Intermittent response
- Operation only when the fob is unusually close to the vehicle
- Repeated button presses being needed
- No response from the vehicle
These symptoms make the battery a reasonable first item to check, but they do not prove that the battery is responsible. Dirty or worn contacts, a loose battery connection, a damaged circuit board, stuck buttons, signal interference, and lost pairing can produce similar behavior. A weak vehicle battery, receiver problem, or door-lock fault may also resemble a failed remote. AutoZone’s general troubleshooting guide describes these symptoms and alternative causes.
If only one button has stopped working while the others remain reliable, do not automatically blame the battery. Test each button separately because an isolated failure may point to a worn button or switch.
Use a spare fob as a diagnostic tool
If you have a known-working spare, test it under the same conditions:
- The spare works normally: The primary fob is the more likely source of the problem. Check its battery, contacts, buttons, housing, and internal electronics.
- Both fobs fail in the same way: Check whether the vehicle has electrical power and whether its interior lock controls work. A vehicle-side fault becomes more plausible.
- Both fobs work only at unusually close range: Consider the testing environment and vehicle receiver as well as the batteries.
- The same vehicle function fails with both fobs: The affected lock, liftgate, or other vehicle feature may require diagnosis.
This comparison is not conclusive if both fobs contain aging batteries, but it can prevent an unnecessary programming or replacement attempt.
Inspect the outside before opening the case
Examine the fob under good lighting. Look for:
- Cracks or impact damage
- A split or separated housing
- Broken areas around the key release
- Signs of moisture exposure
- A distorted case
- A stuck button
- A button that feels different from the others
- Loose internal pieces
If the shell is cracked or its clips are already damaged, opening it may make the housing harder to close. Impact or moisture damage also increases the likelihood that a new battery will not solve the problem.
If the case is intact and the symptoms fit a weak battery, identify the replacement cell before trying to install one.
Verify the Battery Before You Buy
Do not assume every Buick key fob uses the same battery.
Several third-party Buick dealership guides recommend or commonly identify a CR2032, but their instructions generally do not specify every compatible model year, trim, transmitter design, or fob part number. One dealer guide describes the CR2032 as a common coin cell rather than confirming it for every Buick fob. Hiley Buick GMC discusses the CR2032 and notes that procedures can differ by model.
The required cell can differ in:
- Printed battery number
- Diameter
- Thickness
- Quantity
- Polarity
- Fit within the holder
A similar-looking battery is not necessarily the correct replacement. Verify the complete marking instead of relying on the Buick emblem, vehicle name, or coin cell’s appearance.
Use this verification order
1. Read the installed battery. If the housing can be opened safely, use the complete number printed on the old cell as your first reference.
2. Photograph it before removal. Take a clear picture showing the battery number, visible plus symbol, outward-facing side, and position within the holder. This preserves the polarity information if the cell flips over after removal.
3. Check the applicable owner manual. Use the owner manual for the exact model year if the original battery is missing, illegible, damaged, or appears poorly fitted. Look under keys, remote keyless entry, transmitter care, or battery replacement.
4. Identify the exact transmitter if the information conflicts. A previous owner may have replaced the shell or transmitter. If the installed battery does not fit correctly, the case will not close, or the manual illustration does not resemble the fob, ask a Buick parts department or qualified automotive locksmith to identify it.
Where to purchase the battery
Key-fob coin cells are generally inexpensive and commonly available from hardware stores, big-box retailers, automotive dealers, battery shops, and online sellers. Some fobs use more than one battery, so do not assume quantity without opening or identifying the transmitter. Kelley Blue Book provides a general overview of key-fob battery availability and replacement.
Compare the entire printed number before buying. Keep unused cells secured in their original packaging, and return the removed battery to a closed container until it can be handled according to the battery maker’s disposal directions.
Identify the Fob Style and Gather the Right Tools
Before inserting a tool, identify the fob’s basic design:
- Removable emergency key: A release button or slider allows a narrow metal key to be pulled completely out.
- Fixed or folding mechanical key: The key remains attached to the remote.
- No visible mechanical key: The case may still have a seam or opening notch around its perimeter.
A fob with a removable emergency key commonly reveals a slot, notch, or separation point after the key is removed. Some dealership instructions use the released key as leverage; others recommend a small flathead screwdriver for compatible housings. These are general patterns, not proof that every case opens the same way. Buick Lakeland’s dealership guide describes different opening approaches while advising readers to preserve the original battery orientation.
Recommended preparation
Gather:
- The verified replacement battery
- A non-marring plastic pry tool
- An optional small flathead screwdriver
- A clean, well-lit table
- A phone or camera
- A small tray for the emergency key and case pieces
- A secure container for the removed battery
It must still be used gently.
If the housing clearly requires a small screwdriver, place it only in an apparent opening notch, exposed key slot, or designated separation point. Keep the blade shallow and apply light, controlled leverage.
What not to do
Avoid:
- Forcing a tool into the middle of the housing
- Twisting aggressively when the case does not move
- Prying against a button
- Sliding a metal tool along the circuit board
- Pressing on the rubber button pad
- Levering against thin battery contacts
- Pulling from one corner while the remaining clips are engaged
Incorrect handling can damage the outer casing, and dealership instructions that suggest screwdrivers are not tied to every Buick fob design. Stop if the shell does not begin separating with modest pressure. Reinspect the key slot and perimeter, check the model-year manual, or obtain help with the exact fob rather than applying more force.
Replace the Buick Key Fob Battery Step by Step
This workflow accommodates several common fob layouts without claiming that every Buick uses the same opening point, battery, or polarity.
1. Prepare the work area
Work at a clean table rather than over pavement, a sink, or the vehicle interior. Clear enough space that the emergency key, battery, or case insert cannot disappear.
Leave the replacement battery in its packaging until you have confirmed the marking on the installed cell. Keep children and pets away from the work area.
2. Release the emergency key, if present
Find the release button or slider. Hold it in the released position and pull the mechanical key straight out.
Do not pull sideways. If the key does not move, confirm that the release is fully depressed and check for visible dirt or damage around the mechanism.
If the key is fixed or folding, do not try to remove it.
3. Locate the intended opening point
Inspect the space exposed by the removed key and the outer edge of the housing. Look for:
- A shaped notch
- A wider part of the key slot
- Two small indentations
- A seam intended to accept the key or pry tool
- A slight opening near the case edge
If there is no removable key, inspect the entire perimeter. Do not assume an arbitrary point on the side is correct merely because a generic guide says to open the case “at the side.”
4. Start separating the housing
Insert the plastic tool into the apparent opening point and rotate it gently until the first clip releases.
If the emergency key is clearly shaped to fit the notch, it may be used for leverage. Keep it away from the circuit board and do not push it deeper than necessary.
Use a small flathead screwdriver only when the housing provides an appropriate opening point. Stop if the case requires substantial force.
5. Release the remaining clips gradually
Once a narrow gap appears, work around the perimeter and release the other clips one at a time.
Do not pull the halves sharply apart while one side remains fastened. Watch for a rubber button pad, trim piece, or internal insert that may be positioned by the shell rather than permanently attached.
6. Photograph the installed battery
Before touching the cell, take a clear picture that records:
- The complete battery number
- The visible plus symbol, if present
- Which face points outward
- How the battery sits beneath its retaining points
- The position of nearby parts
Write down the number if it is difficult to read in the photograph.
7. Remove the old battery carefully
Examine how the battery is retained. It may need to lift or slide in a particular direction.
Remove it only through the movement allowed by the holder. Do not bend the retaining clips, pry against the circuit board, or remove unrelated internal pieces.
Place the used cell immediately in a secure container. Do not leave it loose on the table or put it in a pocket.
8. Compare the old and new batteries
Confirm that the complete printed markings match. Also compare the physical dimensions.
If the number or dimensions differ, do not install the replacement simply because it fits partway into the holder. Recheck the owner manual or have the transmitter identified.
9. Install the replacement in the original orientation
Use your photograph to install the new battery exactly as the old one was positioned. Do not rely on a universal “positive side up” or “positive side down” rule.
Generic dealership guidance conflicts on polarity. Some instructions tell readers to match the old battery, while another broadly written Buick guide specifies positive-side-down without identifying every compatible fob. That conflict makes the original installation or model-specific manual the more appropriate reference. Midway Motors illustrates the polarity-specific guidance found in some dealership instructions.
Slide the cell beneath the appropriate retaining points and press only as needed to seat it. Do not bend the contacts.
10. Confirm that the battery is seated
The battery should lie flat beneath the intended retaining points. Check for:
- Packaging film or an adhesive tab on the cell
- Dirt or debris beneath it
- A displaced retaining point
- An edge resting above a clip
- An internal piece that shifted during removal
Do not reshape a loose or damaged contact. If the holder no longer retains the battery correctly, stop and seek professional inspection.
11. Reassemble the housing
Align the case halves in their original orientation. Confirm that the button pad, circuit board, trim, and any other internal pieces lie flat.
Press around the perimeter from one clip to the next. Inspect the entire seam after the clips engage.
A visible gap can indicate that:
- A clip has not engaged
- The battery is not seated
- An internal part is misaligned
- The replacement battery is incorrect
Do not compensate by squeezing the case with excessive force.
12. Reinstall the emergency key
Slide the key back into its channel until the retention mechanism engages. Pull it lightly to confirm that it is secure.
Remove the used battery from the work area and follow the disposal or recycling directions supplied by its manufacturer and any applicable local program.
Test the Fob Before Considering Programming
Begin close to the vehicle. Test each button actually present on the fob:
- Lock
- Unlock
- Panic
- Trunk release
- Liftgate release
- Remote start
Operate each button separately. If a function normally requires a long press or sequence, use it in the usual way.
Check the housing and signal
A stuck, unusually soft, or difficult button may indicate a misaligned case or button pad. Inspect the seam for gaps and compare the feel of the buttons.
If every function works near the vehicle, move to the distance from which you normally use the fob. The objective is to confirm normal operation, not establish its maximum possible range.
Possible outcomes include:
- Everything works at the normal distance: The replacement was likely successful.
- Everything works only very close to the vehicle: Recheck the battery number, installation, and seating.
- One button fails while the others work: That button or its switch may be damaged.
- Nothing works: Recheck the installation before attempting programming.
- Buttons bind or the case remains open: Correct the housing alignment.
Battery replacement is not the same as programming
Replacing the battery in an existing paired fob restores power to a transmitter the vehicle already recognizes. Programming a new replacement fob introduces a different security device.
Multiple dealership guides say an existing fob generally does not require reprogramming after a routine battery change. However, that guidance is generic and does not establish an absolute rule for every model and year. Crown Buick GMC presents battery replacement and programming as generally separate issues.
Do not treat any of the following as a universal Buick procedure:
- Holding Lock and Unlock until the vehicle beeps
- Cycling a keyed ignition several times
- Combining door-lock and ignition operations
- Pressing an ambiguously described start button
If a verified and correctly installed battery does not restore recognition, consult the owner manual for the exact model year. If it provides no applicable synchronization procedure, contact a Buick dealer or qualified automotive locksmith.
Troubleshoot a Fob That Still Does Not Work
Do not move directly from a failed test to random programming attempts. Work through the simpler possibilities in order.
1. Confirm the battery number
Compare the replacement with:
- The photograph of the old battery
- The old battery’s complete marking
- The applicable owner manual, when available
If the original cell appeared loose or poorly fitted, use the manual or exact transmitter identification as the deciding reference.
2. Verify polarity
Reopen the case carefully and compare the new battery’s orientation with your photograph.
Do not reverse it solely because a generic article specifies one direction. The available dealership instructions do not support a universal polarity rule.
3. Check battery seating
Make sure the cell:
- Lies flat
- Sits beneath the intended retaining points
- Reaches the contacts as designed
- Allows the housing to close normally
Look for packaging film, an adhesive tab, lint, or other visible contamination.
4. Inspect the contacts without modifying them
Under good lighting, look for:
- Dirt
- Corrosion
- Discoloration
- A visibly loose contact
- Bent or broken components
- A contact that no longer reaches the battery
This is an inspection step, not a repair procedure. Do not bend contacts, scrape the circuit board, apply household chemicals, or attempt soldering unless you are qualified and equipped for electronic repair.
5. Inspect the case and button pad
Confirm that the housing is aligned and fully closed. Press every button separately and compare its travel.
If most buttons work but one does not, complete transmitter failure is less likely than a fault involving that button or its switch. If pressing or flexing the housing produces unpredictable operation, stop manipulating it and have the fob inspected.
6. Retest in another location
Move away from the location where the problem first occurred and test again near the vehicle. This can help determine whether the result is reproducible rather than establishing interference as the cause.
7. Compare the spare fob
If a working spare is available:
- A normally functioning spare points toward a fault in the primary fob.
- Two failing fobs justify checking the vehicle battery, receiver, and locking system.
- Two fobs that fail only in one location make environmental interference more plausible.
- The same failed function on both fobs may indicate a problem with that vehicle feature.
8. Consider a non-battery fault
A fresh battery will not correct:
- A cracked circuit board
- Impact or moisture damage
- A worn button switch
- A loose or corroded battery contact
- A broken housing
- Lost pairing
- A vehicle receiver problem
- A weak vehicle battery
- A faulty lock or actuator
At this stage, use only a recognition or synchronization process documented for the exact vehicle. Repeatedly trying procedures copied from unrelated Buick models can obscure whether the problem is installation, transmitter damage, or the vehicle itself.
Handle a Dead Fob and Know When to Get Help
Many fobs contain an embedded emergency key that may provide mechanical access to the vehicle. Use the fob’s release control to remove it.
Its location and access method vary, so consult the model-year owner manual rather than prying at exterior trim based on another vehicle’s instructions.
Some push-button-start vehicles can recognize a weak or non-powered fob at a designated backup location. Do not assume that holding the fob against the start button is correct for every Buick. Kelley Blue Book’s general dead-fob guidance confirms that emergency keys and vehicle-specific backup-start locations are common considerations.
Use the applicable owner manual to determine:
- How to remove the emergency key
- Where the mechanical door lock is located
- Whether a lock-cylinder cover must be removed
- Where the fob should be placed for backup starting
- Which pedal, button, or ignition sequence applies
- Whether a recognition procedure is documented
When professional assistance is appropriate
Stop the DIY process and consider a Buick dealer or qualified automotive locksmith if:
- The housing is cracked or will not close
- Retaining clips are broken
- The emergency-key release is damaged
- Contacts are loose, bent, or corroded
- The circuit board shows visible damage
- The fob has substantial moisture damage
- The verified battery does not restore operation
- Model-specific synchronization is required
- A replacement transmitter must be programmed
- The spare works but the primary fob has an internal fault
- Both fobs fail and vehicle-side diagnosis is needed
Ask whether the provider can identify the transmitter, test its signal, diagnose a receiver problem, program a replacement, or cut an emergency key.
Programming a replacement transmitter is a separate security procedure and may require identification and proof of vehicle ownership. Hiley Buick GMC, for example, states that these documents are required in its replacement-fob process. That requirement should not be confused with routine battery replacement.
Frequently Asked Questions
What battery does a Buick key fob use?
Several dealership guides commonly recommend a CR2032, but the available evidence does not establish that battery as correct for every Buick model, year, trim, or transmitter.
Read the complete number on the installed cell and photograph it before removal. If it is missing, illegible, or poorly fitted, check the owner manual for the exact model year or have the transmitter identified.
Which side of the battery faces up in a Buick key fob?
There is no adequately supported universal positive-side-up or positive-side-down rule for every Buick fob. Generic dealership instructions conflict and often do not identify the fobs to which their directions apply.
Photograph the installed battery before removal and place the verified replacement in the same orientation. If the original installation appears questionable, follow model-specific documentation.
Do I need to reprogram my Buick key fob after changing its battery?
An existing paired fob generally is expected to work after routine battery replacement, according to multiple dealership guides, but that is not an absolute rule for every Buick.
Before considering synchronization, verify the battery number, polarity, seating, contacts, and housing alignment. Use only a follow-up procedure documented for the exact model year.
Why does my Buick key fob still not work after battery replacement?
Possible causes include:
- An incorrect battery
- Reversed polarity
- Poor seating
- Packaging film or contamination
- Misaligned housing or button pad
- Dirty, loose, corroded, or damaged contacts
- Worn buttons
- Circuit-board damage
- Lost pairing
- Signal interference
- A vehicle battery, receiver, lock, or actuator fault
Test the buttons individually and compare the result with a working spare when available.
Can I unlock or start my Buick if the key fob battery is dead?
Possibly. Many fobs contain an emergency mechanical key, and some vehicles provide a designated location where a weak or dead fob can be recognized for starting.
Both procedures are vehicle-specific. Consult the owner manual for the exact model year rather than assuming the door cylinder is exposed or the fob belongs against the start button.
Final verify-replace-test checklist: Confirm the complete battery number, photograph the original polarity, open the housing only at its intended seam or notch, seat the matching cell securely, close the case completely, reinstall the emergency key, and test every available function. If operation does not return, compare a spare fob and use the model-year owner manual to distinguish an installation problem from a transmitter, synchronization, or vehicle-side fault before contacting a Buick dealer or qualified automotive locksmith.