
Identify Your Hyundai Fob, Replace the Coin Cell, and Test It Safely
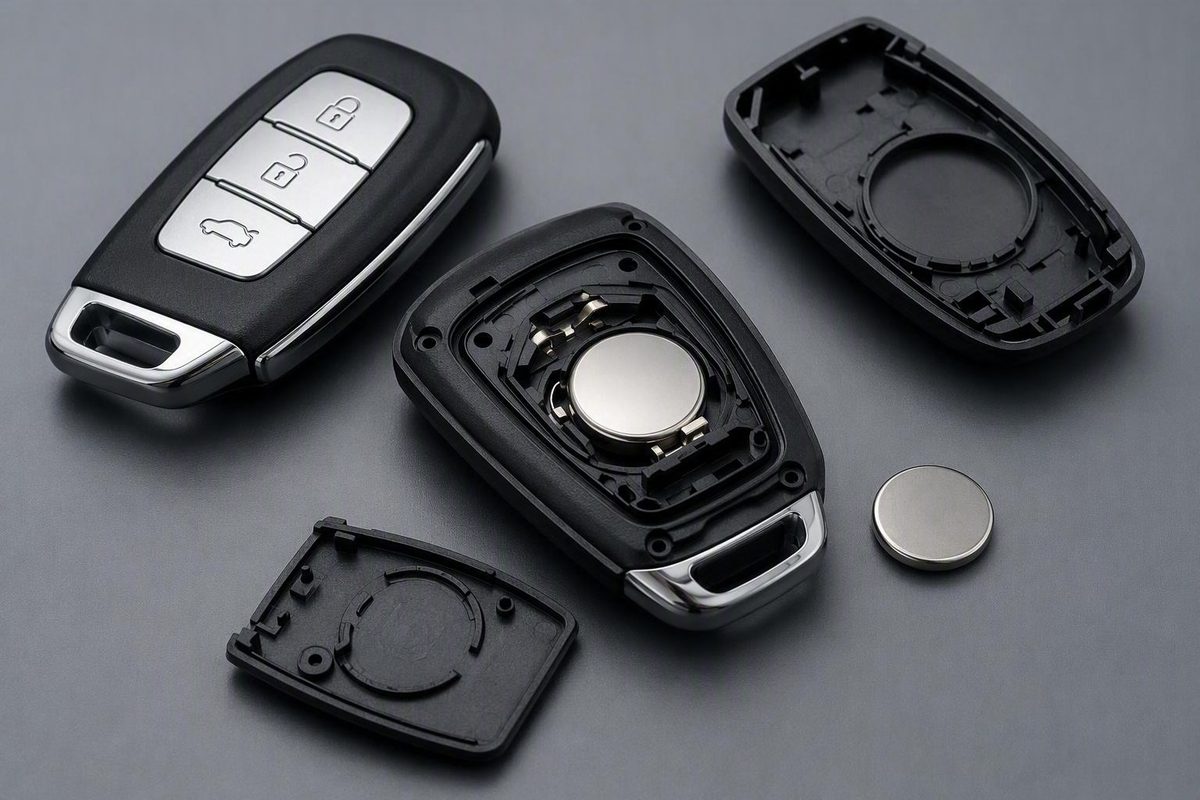
CR2032 is common, but some fobs use CR2450. Verify the installed code and polarity, open at the intended release point, then test every function.
Changing the battery in a Hyundai key fob can be straightforward, but Hyundai remotes do not all use the same battery, housing, or opening method.
This guide is a cautious overview compiled primarily from Hyundai dealership guidance, not a universal Hyundai service procedure. Before acting, match the instructions to the visible construction of your fob and check model-specific owner documentation when available. If you cannot positively identify the release point, battery code, or polarity, stop rather than guessing.
A dependable replacement follows six checks:
- Identify the visible fob design.
- Record the complete code and orientation of the installed battery.
- Open the housing only at its intended release point.
- Install an exact replacement cell.
- Close the case without forcing it.
- Test every available function before considering synchronization or programming.
Before You Start: Identify the Fob and Verify the Battery
CR2032 is commonly reported for Hyundai key fobs, but do not buy one solely because a package or generic guide says “Hyundai.” One dealership guide says most Hyundai fobs use CR2032 while some use CR2450. That establishes that battery sizes vary; it is not a compatibility chart for every vehicle or remote. Check the installed cell or documentation matched to your vehicle and fob before purchasing a replacement. Checkered Flag Hyundai World describes this battery variation.
Record the following before opening the case:
- Hyundai model and model year
- Whether the fob has a removable emergency key
- Whether it has a flip-out blade
- Any visible release button, defined notch, screw, or removable cover
- Any identifying label or part number on the housing
Then compare its visible construction with these broad—not comprehensive—design categories:
Removable emergency-key fob: A button or sliding release allows a separate metal key to be withdrawn. A small opening near or inside the key channel may be the intended point for separating the cover.
Side-notch snap case: A distinct notch appears along the case seam. A coin or small flathead screwdriver may be twisted at that notch to begin releasing the clips.
Flip-key or screwed case: The blade folds into the housing. Some versions have a removable outer cover, screws, and another cover beneath it. A screwed case must not be treated as a basic snap-only housing.
These categories are only a visual selection aid. The supplied evidence does not establish a comprehensive model-year chart, so avoid assuming that “newer” or “older” automatically identifies the correct procedure.
Verify the battery three ways
Before removing the installed cell, look for its complete code. Also check for:
- A battery code printed or molded inside the compartment
- A
+or−polarity marking beside the holder - A battery specification in documentation matched to the exact vehicle or fob
If the installed battery and compartment marking disagree, stop. Do not choose between them by guesswork; consult documentation matched to the exact remote.
CR2025 and CR2032 show why similar-looking coin cells should not be treated as interchangeable. Both are nominally 3-volt cells with a 20 mm diameter, but CR2025 is 2.5 mm thick and CR2032 is 3.2 mm thick. That 0.7 mm difference can affect fit and terminal contact. Microbattery lists the shared voltage and diameter and the different thicknesses.
Use the exact specified code. Do not force a thicker cell into the holder, add foil or another conductive spacer beneath a thinner battery, or assume that matching voltage and diameter are sufficient.
Before opening the housing, photograph both sides of the assembled fob. Once the cover is loose, photograph the installed battery before removing it. The images will preserve the original polarity, button positions, case arrangement, and location of any seal or loose insert.
Tools and Setup for the Main Hyundai Fob Designs
Gather tools only after inspecting the case. Depending on its design, you may need:
- The exact replacement coin cell
- The removable emergency key, if equipped
- A coin for a clearly defined case notch
- A small flathead screwdriver for an intended opening
- A small Phillips screwdriver if visible Phillips screws are present
- A soft cloth or shallow tray
- A phone or camera
Work on a clean, dry, well-lit surface where small screws and case pieces will remain visible. Lay the parts down in their original orientation as the housing comes apart.
Inspect the entire perimeter before inserting a tool:
- Removable-key design: Release and withdraw the metal key, then find the small opening associated with the key channel.
- Side-notch design: Find the distinct notch in the seam rather than choosing an arbitrary point.
- Screwed flip-key design: Look for a removable outer cover and screws beneath it.
Use a screwdriver or key as a controlled twisting tool at the intended opening. Keep the tip shallow rather than pushing it toward the internal electronics.
Stop immediately if:
- The case needs substantial force
- The plastic flexes but the clips do not release
- The case begins to crack
- The fob does not match the selected instructions
- You discover screws or another fastening feature
- A seal, contact, or circuit-board edge appears trapped
Unexpected resistance may indicate the wrong opening point or a different housing design. Reinspect the case and find documentation for the exact fob instead of applying more force.
How to Open a Removable-Key or Side-Notch Hyundai Fob
The following procedures cover two snap-together designs described in Hyundai dealership guidance. They do not establish a universal opening method for all Hyundai remotes.
Removable emergency-key design
- Hold the fob securely.
- Press or slide the emergency-key release.
- Withdraw the metal key completely.
- Inspect the exposed channel and rear housing for the intended opening.
- Insert only the end of the metal key into that opening.
- Twist gently until the cover begins to separate.
- Remove the key and continue opening the housing with your fingers.
Dealership guidance describes removing the emergency key and turning it in the small opening to release the cover. It separately describes using a coin or flat-blade screwdriver for a side-notch design and notes that the procedure can depend on model and year. Hyundai of Milledgeville outlines both approaches.
The emergency key should act as a twisting tool at the designed opening. Do not push it deeply into the housing. If it merely marks or deforms the plastic, stop and confirm that you have found the release point.
Side-notch snap case
- Locate the defined notch along the case seam.
- Place a coin or the tip of a small flathead screwdriver in the notch.
- Hold the fob so the tool cannot slip toward your hand.
- Twist slightly until the adjacent clips begin to release.
- Remove the tool and separate the housing with your fingers.
- If needed, work gradually along the seam instead of levering aggressively at one point.
Do not insert a screwdriver into the middle of an unmarked seam. If no notch is clearly identifiable, do not proceed as though the fob were a side-notch case.
As the case opens
Open the housing slowly and watch for:
- Loose button inserts
- A flexible button membrane
- A perimeter seal
- A circuit board resting in one half
- Small pieces belonging to the emergency-key release
- A battery holder beneath or attached to the board
Place each component on the work surface in the orientation in which it was removed. Use your photographs if anything shifts.
Do not routinely remove the circuit board. Move it only when battery access genuinely requires it, and handle it minimally by its edges. If the battery cannot be reached without an unclear disassembly step, pause and find instructions for the exact fob.
Remove the Old Cell and Install the Exact Replacement
Before touching the cell:
- Photograph which face is upward.
- Record the complete battery code.
- Note any
+or−marking in the compartment. - Keep the replacement separate so the old and new cells cannot be confused.
Remove the old battery
Inspect how the battery is retained.
Release it with a fingernail where practical. If a small flathead screwdriver is necessary, keep its tip at the battery edge and use only enough movement to free the cell. Do not deliberately bend a terminal or retaining arm unless the holder’s construction clearly calls for that movement.
Compare the old and new cells side by side after removal. Confirm that the complete codes match—not only the 3V marking or apparent diameter.
Install the replacement
Install the exact replacement in the same orientation as the old battery unless a clearly applicable compartment marking instructs otherwise. Positive-side-up appears in some documented examples, but it is not a universal Hyundai rule.
Some holders require one edge of the cell to slide beneath fixed tabs before the opposite edge is pressed down. Make sure the battery is beneath—not resting on top of—the features intended to retain it.
Once installed, confirm that the cell:
- Sits flat
- Is secured by the holder
- Does not wobble or spring out
- Reaches the electrical contacts
- Matches the compartment depth
- Does not interfere with the button membrane
Dealership guidance recommends preserving the installed battery’s orientation, confirming contact with the terminals, and recognizing that procedures vary by Hyundai model year. North Freeway Hyundai describes these checks.
Reassemble the housing
Return the button membrane, board, seal, and internal supports to their original positions. Confirm that every button aligns with its corresponding switch and that no seal or membrane edge crosses a case clip.
Align the housing before pressing it closed. If one side uses fixed hooks, engage that side first; then press around the perimeter with your fingers until the clips engage.
If the housing does not close normally, reopen it and check for:
- The wrong battery thickness
- A cell resting above its retaining tabs
- A shifted circuit board
- A folded or displaced button membrane
- A seal outside its channel
- A displaced emergency-key release component
- A blocked or misaligned clip
Do not use pliers or strike the case to close it. When the seam is even, reinstall the emergency key and confirm that the release secures it.
Matched Example: 2020–2023 Hyundai Venue Flip-Key Fob
This example comes from a third-party tutorial for the specific 2020–2023 Hyundai Venue flip-key fob shown in the video. It is not an official Hyundai procedure and must not be extrapolated to a Venue fob—or another Hyundai remote—that lacks the same visible construction.
The demonstrated supplies are:
- One CR2032 battery
- A small Phillips screwdriver
- A small flathead screwdriver
The shown fob has a flip-out blade, two notches on the blade side, a removable outer back cover, two Phillips screws, and an inner cover. If your fob does not have all of those features, stop and find instructions for its exact design.
Demonstrated opening sequence
- Flip the metal blade fully open.
- Hold the fob with the buttons facing down.
- Examine the side from which the blade emerged.
- Locate the two small notches on that side.
- Place the small flathead screwdriver in one notch and lift gently until the outer cover begins to release.
- Repeat at the second notch if necessary.
- Remove the loosened outer back cover.
- Remove the two visible Phillips screws.
- Keep the screws together on the cloth or in a tray.
- Lift off the inner cover to expose the battery.
The PYR Automotive video identifies the shown remote as a 2020–2023 Venue fob and demonstrates its CR2032 battery, two screws, layered covers, and opening notches. Watch the third-party Venue demonstration on YouTube.
In that specific holder, the replacement CR2032 slides beneath the lower retaining tabs before being pressed into place. The positive side faces up. That polarity applies only to the demonstrated fob.
Refit the inner cover, replace both screws, and secure them without excessive tightening. Reattach the outer cover and press around its perimeter until it sits evenly.
Operate the flip blade and each button after reassembly. If the blade catches or a button remains depressed, reopen the housing and check the internal alignment.
Test Every Available Function After Reassembly
Test in this order:
- Press lock and confirm a response.
- Press unlock and check the expected doors.
- Test the trunk or liftgate release, if present.
- Test the panic control, if present, in an appropriate location.
- For an equipped smart key, test proximity entry.
- Test push-button start using the normal method, if equipped.
- Move farther away and check whether the usual operating range has returned.
Do not treat one successful lock command as proof that the whole fob works.
Inspect the physical assembly too:
- The case seam is even.
- No button remains depressed.
- Every button moves and returns normally.
- The emergency key locks securely in place.
- A flip blade opens, closes, and latches normally.
- Nothing rattles unexpectedly inside the housing.
Reported signs of a weakening Hyundai fob battery include reduced range, intermittent response, repeated button presses, and a dashboard low-battery message. Improvement in those symptoms, together with consistent responses across all available functions, provides stronger confirmation than one successful press. Checkered Flag Hyundai World lists these warning signs and post-replacement tests.
If the controls work nearby but range remains poor, recheck the battery code, seating, and contact before considering the replacement complete.
If the Hyundai Key Fob Still Does Not Work
A failed first test does not prove that the remote needs replacement or programming. Troubleshoot the installation in order.
1. Confirm the battery code
Compare the full code on the new cell with the old cell, compartment marking, or matched documentation. A battery with the same voltage and diameter may still have a different thickness.
Also make sure the old cell was not accidentally reinstalled.
2. Check polarity
Reopen the housing and compare the battery with your photograph and any visible compartment marking. Do not assume the positive face must be visible because it was visible in another Hyundai tutorial.
3. Check seating and terminal contact
Confirm that the battery is flat, beneath the correct tabs, and touching the terminals. Inspect from the side where possible.
Check that the case closes fully and that no shifted internal part prevents the battery from remaining seated.
4. Inspect for visible damage or displacement
Without attempting electronic repair, look for:
- Bent or flattened contacts
- Cracked plastic around the holder
- A broken retaining tab
- Moisture or corrosion
- A torn or displaced button membrane
- Loose internal pieces
- Visible circuit-board damage
Do not scrape or solder the circuit board based on a generic guide. If the board or battery holder is damaged, move to qualified assistance.
5. Check button and case alignment
A button insert or membrane can shift beneath the shell. Reopen the housing and ensure that each button sits centrally in its opening.
If the fob responds while the housing is loosely aligned but fails after it is snapped shut, recheck the battery thickness, battery position, board placement, and button alignment.
6. Try another fresh, verified battery
Try another fresh battery carrying the exact verified code and install it in the recorded orientation.
Do not stack batteries, add foil, or force the shell closed to compensate for poor contact.
7. Compare the spare fob
If a spare paired fob is available, test it near the vehicle. If the spare works and the serviced fob does not, continue focusing on the serviced remote’s battery installation, contacts, buttons, and electronics.
If both fail, the issue may extend beyond the cell you replaced. This comparison helps narrow the problem but does not diagnose the vehicle or either remote by itself. Dealership troubleshooting guidance also recommends checking insertion and contacts, consulting the owner’s manual, and comparing operation with a spare fob. Huffines Hyundai Plano outlines these troubleshooting steps.
Consult model-specific owner documentation, a qualified automotive locksmith, or Hyundai service if:
- The housing cannot be opened normally
- A screw is stripped or a clip breaks
- The holder or terminals are damaged
- Moisture or corrosion is present
- The circuit board is cracked or displaced
- The correct battery or polarity cannot be verified
- A correctly installed fresh battery does not restore operation
- Both available fobs fail
Continued failure does not establish that the remote must be replaced. Installation, physical damage, synchronization, another fob component, or a vehicle-side issue may require further diagnosis.
Battery Replacement, Resynchronization, and New-Fob Programming Are Different
Routine battery replacement in an existing paired fob should not automatically be described as erasing its programming. Three separate tasks are often confused:
- Battery replacement: Installing the specified cell in an existing paired remote.
- Synchronization or reset: A model-dependent process that may restore communication in particular circumstances.
- New-fob programming: Pairing a previously unpaired remote with the vehicle.
These procedures are not interchangeable. Likewise, a new unpaired fob should not be treated as though it only needs a battery swap.
The available dealership pages do not support publishing a universal Hyundai synchronization sequence. One gives an ACC-mode sequence involving an “open” or unlock button, while another says to hold both unlock and “open”; neither establishes the applicable models, years, timing, or button labels. Hyundai of Hampton publishes one of the underspecified sequences.
Because the published sequences conflict and lack clear applicability, do not repeatedly cycle the ignition or try arbitrary button combinations from a guide for another remote. Use the owner’s manual or other documentation matched to the exact model, year, and fob.
Follow this decision order:
- First: Verify the exact battery, polarity, seating, contacts, and case alignment.
- Second: Test every available function close to the vehicle.
- Third: If the correctly installed cell does not restore operation, consult model-specific documentation for any applicable synchronization process.
- Finally: Seek a qualified automotive locksmith or Hyundai service provider when no matched procedure is available or the fob has visible damage.
Frequently Asked Questions
What battery does a Hyundai key fob use?
CR2032 is commonly reported, but it is not universal. Verify the complete code on the installed battery, a compartment marking, or documentation matched to the exact vehicle and fob.
Which side of the Hyundai key-fob battery faces up?
There is no reliable Hyundai-wide answer. Photograph the installed cell before removing it and follow any clearly applicable polarity marking in the holder.
Positive-side-up is shown for the specific 2020–2023 Venue flip-key fob in the third-party example above, but that orientation must not be assumed for other Hyundai remotes. The matched Venue video demonstrates that model-specific orientation.
Can I use a CR2025 instead of a CR2032 in a Hyundai key fob?
Not unless the exact fob specification permits it. Both cells are nominally 3 V and 20 mm in diameter, but CR2032 is 3.2 mm thick and CR2025 is 2.5 mm thick. Use the specified code rather than forcing a thicker cell or adding a conductive spacer to a thinner one.
Does a Hyundai key fob need reprogramming after a battery change?
Do not assume that routine battery replacement erases an existing fob’s programming. First verify the battery code, polarity, seating, terminal contact, and operation.
If the fob remains unresponsive, consult documentation for the exact vehicle to determine whether a model-specific synchronization step applies. Programming a new, previously unpaired fob is a separate task and may require qualified assistance.
Why is my Hyundai key fob still not working with a new battery?
Possible installation problems include the wrong battery code, reversed polarity, poor seating, inadequate terminal contact, a displaced button membrane, or an incompletely closed case. The replacement battery itself may also be weak.
Recheck the installation, try another fresh cell of the verified type, and compare the spare fob if available. If those checks fail—or if you find moisture, damaged contacts, broken plastic, or circuit-board damage—consult matched owner documentation, a qualified automotive locksmith, or Hyundai service.
Before finishing, verify the essentials one final time: match the instructions to the visible fob design; record the old cell’s exact code and orientation; open only at the intended release point; seat the exact replacement against the contacts; close the housing without force; and test every available function. If those checks do not restore operation, avoid an unverified universal programming ritual and move to model-specific documentation or qualified automotive help.