
2008 Honda Accord Key Fob: Battery, Fixes and Replacement
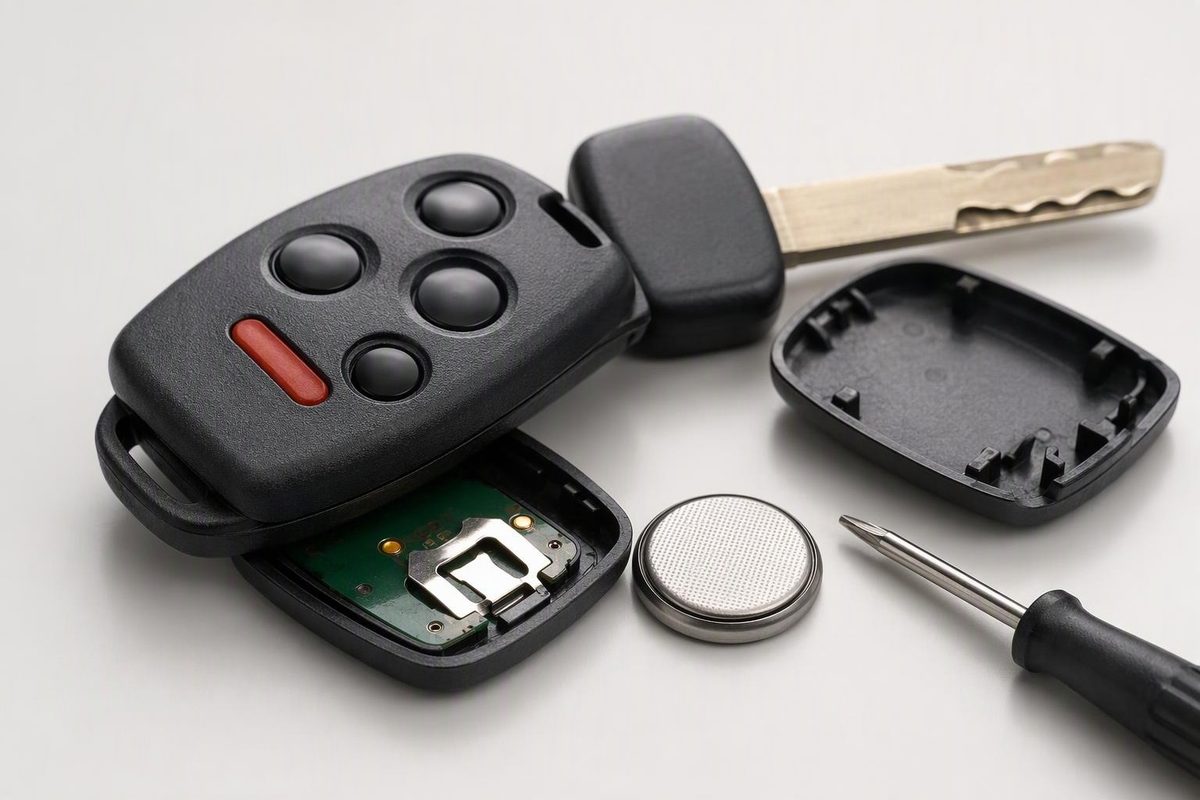
Find the 2008 Honda Accord’s original key-fob battery, replace it safely, and separate remote-locking faults from immobilizer and replacement-key problems.
The original 2008 Honda Accord remote-head key uses a CR1616 battery—not the CR2032 found in some newer Honda fobs. Honda specifies CR1616 in both the 2008 Accord sedan manual and the 2008 Accord coupe manual, on printed pages 88–89.
This guide covers the U.S./Canadian-market, turn-key ignition design documented in those manuals: a metal key blade attached to a remote with lock, unlock, trunk and panic buttons. If yours is an aftermarket flip key, separate remote or another design, verify its battery marking and opening instructions before using these steps.
First, separate the three key functions
A remote-head key combines functions that can fail independently:
- Remote buttons: operate the door locks, trunk release and panic function.
- Mechanical blade: provides access through the driver’s door lock.
- Immobilizer coding: allows the engine to run when the vehicle recognizes the key.
Honda describes the key’s immobilizer circuitry separately from the remote transmitter. The light-grey valet key has no battery, yet operates the ignition and driver’s door lock. A remote-button failure therefore does not, by itself, mean the starting function has failed. See the sedan manual’s Keys and Locks and Immobilizer System sections, pages 76–77.
If the buttons stop working but your existing key still starts the engine, begin with the remote battery—not immobilizer programming. Use the blade in the driver’s door lock for access while troubleshooting.
Replace the CR1616 battery
Honda recommends replacing the transmitter battery when locking or unlocking takes several button presses. Have a new CR1616 and a correctly fitting small Phillips-head screwdriver ready. Keep both new and removed coin cells away from children.
For the original screw-fastened remote:
- Remove the screw at the base of the transmitter. Apply controlled pressure; the coupe manual specifically warns that the screw head can strip. Stop if the screwdriver slips rather than forcing it.
- Separate the outer case at its middle seam using your fingernail. Do not force the case apart if the screw is still holding it.
- Release the two tabs on the inner cover to separate it from the keypad. Note the positions of the parts and photograph the battery’s orientation before removing it.
- Remove the old battery. Confirm that it is marked CR1616. If the cell or internal design differs, stop and identify that remote before continuing.
- Insert the new battery into the back of the inner cover with the positive (+) side facing down. “Down” refers to Honda’s inner-cover arrangement, not simply whichever way you are holding the outer case. Use the holder markings and your photograph to check orientation.
- Reassemble in reverse order, making sure the tabs and case fit properly before replacing the screw.
These steps follow Honda’s procedure in the sedan manual, pages 88–89; the coupe manual gives the same battery and polarity.
Honda’s battery-replacement procedure ends with reassembly; it does not prescribe a programming or reset sequence after an ordinary battery change. Test the existing remote before attempting any pairing procedure.
Test without mistaking normal operation for a fault
Remove the key from the ignition and fully close the doors before testing. Honda says the remote cannot lock the doors with the key in the ignition or a door not fully closed. The trunk button also will not open the trunk with the key in the ignition; normally, it requires a hold of about one second. These restrictions appear in the sedan manual, pages 86–87.
If the remote still fails:
- Recheck the battery code, polarity, seating and keypad alignment.
- Compare it with a spare remote under the same conditions. A working spare helps narrow the problem to the first remote; two failing remotes warrant checking the vehicle as well.
- If the interior power-lock switch also cannot operate the locks with the key removed and doors closed, do not keep buying fob batteries. Have the vehicle’s electrical and locking systems checked.
If the key will not start the engine
When you turn the ignition to ON (II), the immobilizer indicator should come on briefly, then go off. If it starts blinking at ON (II), the vehicle does not recognize the key’s coding. Honda instructs you to turn the ignition to LOCK (0), remove the key, reinsert it and try ON (II) again. Move other immobilizer keys or metal objects away from the ignition, since Honda identifies them as possible interference sources. If recognition repeatedly fails, contact a dealer. These instructions are in the Immobilizer System section, page 77.
Do not treat every no-start as a key-coding problem. Without that indicator behavior, the remote’s coin cell is not a sufficient diagnosis.
Buying a replacement: pairing is not the whole job
Confirm compatibility by VIN and the original remote’s identification markings, not just its shape. For example, retailer NorthCoast Keyless lists more than one remote identifier for the 2008 Accord on its model-specific page.
Honda directs owners to a dealer for replacement-transmitter programming. NorthCoast also publishes at-home remote-pairing instructions, but explicitly says they program only the remote portion, not the transponder that authorizes starting. A replacement key needing that function requires professional immobilizer programming and, if its blade is uncut, blade cutting—not merely an ignition-and-button sequence.
Before buying, ask a Honda dealer or automotive locksmith to confirm the compatible part and quote blade cutting, remote pairing and immobilizer programming separately. For the DIY distinction, see our Honda Accord key-fob programming guide.