
Change Your Chevrolet Key-Fob Battery Without Guessing the Size or Polarity
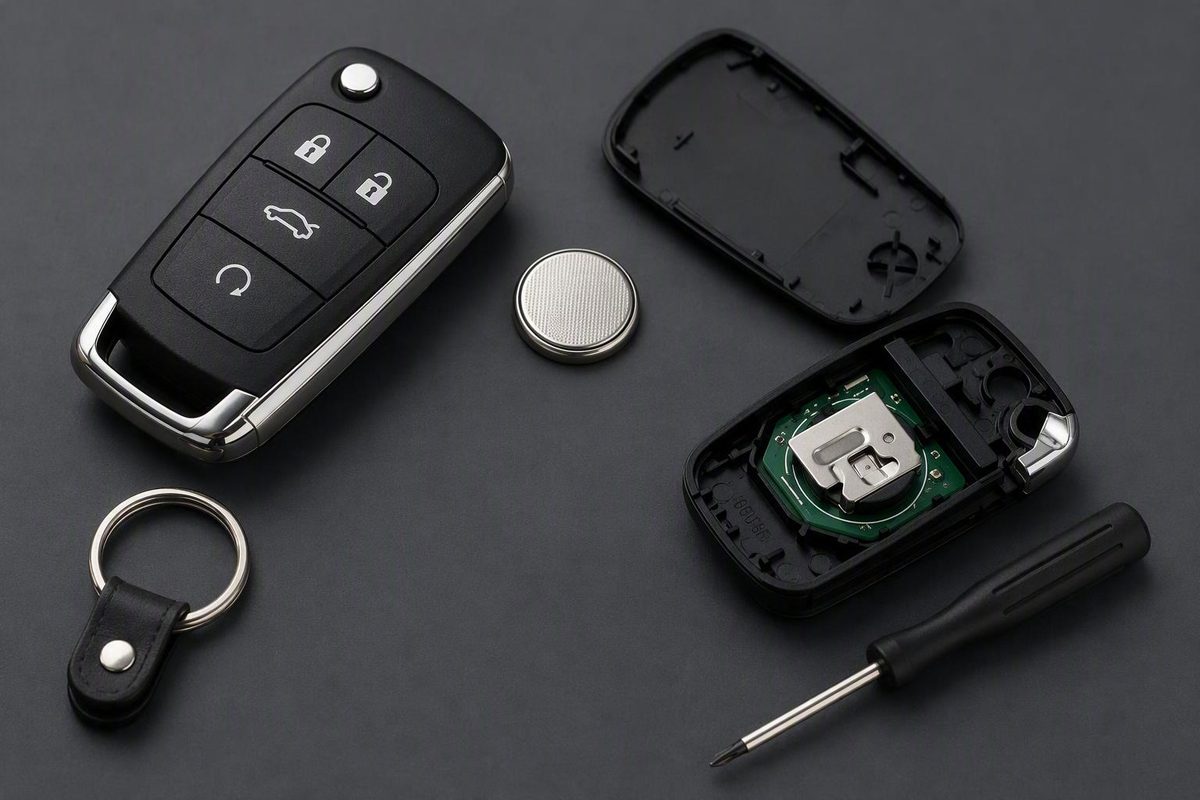
First identify a smart, flip-key or standard remote. CR2032 is common, but verify the old cell's full code and polarity before fitting an exact match.
Replacing a Chevrolet key-fob battery is often a manageable DIY task, but this is a general identification and replacement workflow—not exact compatibility guidance for every Chevrolet model, year, or fob part number.
Chevrolet has used several remote designs, opening methods, battery sizes, and polarity arrangements. CR2032 is common, while some smart remotes may use CR2450; the available guidance does not identify every compatible fob. Verify the exact cell before buying or installing a replacement. NYE Chevrolet recommends checking the owner’s manual or the number engraved on the old battery.
The reliable approach is to:
- Identify the physical fob style.
- Find its designated opening point.
- Photograph the installed battery.
- Verify the complete battery code and polarity.
- Install an exact-code replacement.
- Close the housing evenly.
- Test every equipped function before considering synchronization or repair.
Check Whether the Battery Is the Likely Problem
A weak key-fob battery often produces a gradual decline rather than an immediate failure. Possible symptoms include:
- Reduced operating range
- Intermittent response
- Buttons that must be pressed repeatedly
- Complete nonresponse
- A low-key-battery dashboard message
- Unreliable passive-entry or push-button-start recognition, where equipped
These symptoms make the battery a sensible first check, but they do not prove it is the cause. Chevrolet dealership guidance identifies short range, inconsistent button response, repeated presses, dashboard warnings, and unreliable push-button-start recognition as possible signs of a weak battery. See the warning signs and general replacement guidance from Steve Austin’s Auto Group.
Consider how the problem developed. A remote that has gradually required shorter distances or repeated presses is consistent with a weakening cell.
Other faults can resemble a dead battery:
- Dirty, worn, corroded, bent, or loose battery contacts
- Damaged or displaced buttons or button pads
- Moisture inside the housing
- A cracked case or damaged circuit board
- Lost pairing or a model-specific synchronization issue
- Radio-frequency interference
- A weak or disconnected vehicle battery
- A problem with the vehicle receiver or door-lock system
If you have a spare fob, compare the two before opening either one. When the spare works normally, the problem is more likely confined to the primary remote. If neither works, a vehicle-side fault becomes more plausible—although two old fobs can also have weak batteries. General diagnostic guidance likewise recommends testing a second fob and considering interference, the vehicle battery, receiver, or lock system if both fail. Review AutoZone’s key-fob troubleshooting overview.
Treat battery replacement as the first diagnostic step, not a guaranteed cure.
Identify Your Chevy Key-Fob Style Before Opening It
Chevrolet has used multiple remote designs. Identify yours by its physical construction rather than relying on a broad model-year chart.
Smart or proximity fob
A smart or proximity fob is commonly associated with passive entry or push-button start. It usually has:
- No permanently exposed key blade
- A small release button or slider
- A removable mechanical emergency key
- A housing seam, slot, or notch that may become accessible after the key is removed
Remove any protective cover and inspect both edges and ends. Do not assume the entire emergency-key cavity is a pry point. Look for a shaped slot, ledge, or notch intended to accept the key tip or an opening tool.
Flip-key fob
A flip-key design has a metal blade that folds into the housing and swings outward when released. Its battery may be behind a separate rear cover rather than between two full housing halves.
Look for:
- A folding blade
- A rear-cover seam
- A release point or edge notch
- A visible division between the button section and battery cover
Extending the blade may expose the cover seam. Do not force the blade sideways against its pivot unless the housing clearly provides an opening point there.
Standard remote
A standard remote is generally a separate button unit without a folding blade. Depending on the design, it may accompany a conventional ignition key or include remote-start controls.
Inspect it for:
- A side slot
- A molded edge notch
- A seam between the front and back halves
- A section shaped for a coin, plastic pry tool, or small flathead screwdriver
General dealership guides commonly divide Chevrolet remotes into smart, flip-key, and standard styles, but the opening and installation procedures differ among those categories. Compare the three broad fob designs and their differing procedures.
The broad category does not establish the exact battery, pry point, internal arrangement, or polarity.
If you cannot confidently identify the opening point, stop and consult the owner’s manual for the exact Chevrolet model and year. If needed, use the fob’s part number to seek model-specific assistance. Do not force an arbitrary section of the seam.
Verify the Battery Instead of Assuming It Is a CR2032
CR2032 is common in Chevrolet remotes, but it is not universal.
Some smart remotes may use CR2450, and a particular design may specify another cell. The supplied sources do not identify which exact Chevrolet fobs use CR2450, so this should not be treated as model-level compatibility guidance.
The available evidence also does not establish a dependable rule that every pre-2020 fob uses one battery and every 2020-or-newer fob uses another. Model-year shortcuts should be ignored unless confirmed for the exact remote.
Use this verification order:
- Consult the model-specific owner’s manual. Look under keys, doors and locks, remote keyless entry, or vehicle care.
- Read the complete code engraved on the installed battery. Do this after opening the housing but before discarding the cell.
- Check the holder and housing. Look for a battery diagram, code, or molded polarity symbol.
- Resolve conflicting or unreadable information before proceeding. Identify the fob by part number and ask a qualified parts provider, automotive locksmith, or Chevrolet service provider for model-specific help.
Do not select a replacement solely because it looks similar or fits inside the opening. Match the complete verified code.
Before removing the original cell:
- Photograph its labeled face while it is installed.
- Record the complete code.
- Note which side faces the front or back of the housing.
- Find any molded
+or−symbol near the holder.
Do not rely on memory once the battery has been removed.
Gather the Tools and Protect the Fob
Prepare the workspace before opening the housing. Depending on the design, you may need:
- The correctly verified replacement coin cell
- The removable emergency key
- A plastic opening tool
- A small flathead screwdriver or coin
- A phone or camera
- A clean, dry, well-lit, flat work surface
Remove any decorative or protective shell. Work somewhere that a loose cover, button, emergency key, or other small part will not disappear.
Before lifting the old battery, take a clear photograph showing:
- The complete battery code
- The visible positive or negative face
- The retaining clips or contacts
- The battery’s position relative to the housing
Use only the designated seam, slot, or notch. A plastic pry tool may help avoid cosmetic damage when it fits the opening point. If the design calls for a coin, emergency key, or small screwdriver, insert it only far enough to engage the slot; do not drive it into the middle of the seam or toward the circuit board.
Apply gentle, controlled pressure. If the case does not begin to separate, stop and inspect it again instead of increasing force. Forcing the housing can break its plastic tabs, and dealership guidance specifically recommends avoiding excessive force while keeping the interior clean and dry.
Handle the replacement cell by its edges where practical. Avoid bending the battery contacts or scraping the circuit board.
Do not automatically remove the circuit board, rubber button pad, buttons, or perimeter seal. One generalized smart-fob procedure calls for removing internal components, while many other remotes provide direct battery access. Component removal is not a universal Chevrolet step. Leman’s Chevrolet City illustrates how procedures can differ among smart, flip-key, and standard remotes.
If the battery is concealed beneath electronics and there is no obvious, safe release method, stop and obtain instructions for the exact housing.
Replace the Battery in the Three Common Fob Designs
Use this universal sequence before moving to the instructions for your fob style:
- Remove the emergency key if present.
- Locate the intended opening point.
- Separate the housing or remove its battery cover gently.
- Photograph the old cell while it remains installed.
- Record the complete code and polarity.
- Remove the cell without bending the holder.
- Install an exact-code replacement in the recorded or marked orientation.
- Ensure the cell sits beneath or against its retaining contacts.
- Align and close the housing evenly.
- Reinstall the emergency key and test the remote.
Important: These are general, shape-based procedures assembled from third-party guidance. They are not official, model-specific Chevrolet service instructions. Follow the owner’s manual whenever its procedure differs.
Smart or proximity fob
- Release the emergency key. Press or slide the release while pulling the internal metal key straight out.
- Inspect the key cavity and perimeter. Find the designated opening slot or notch rather than assuming any gap is suitable.
- Insert the appropriate opening tool. Use the emergency-key tip, a plastic pry tool, or a small flathead screwdriver only if it fits the intended point.
- Twist gently. Release the first retaining clips without pushing the tool deeply into the housing.
- Work around the seam. Separate the remaining clips gradually.
- Photograph and identify the battery. Capture its code and visible face before removal.
- Release the old cell. Lift it at the accessible edge without scraping nearby electronics or bending the retaining fingers.
- Install the matching replacement. Engage any fixed tabs first, then press the opposite edge into place.
- Check the fit. The cell should lie flat and remain in contact with the holder.
- Close the fob. Align the housing halves and press around the perimeter until the seam is even.
- Reinsert the emergency key.
Some generalized smart-fob instructions place the positive side down, but that is not a universal Chevrolet rule. Follow the original cell’s recorded orientation and any internal polarity marking.
Do not remove the circuit board simply because the remote is a smart design. Remove internal parts only if the exact housing procedure clearly requires it.
Flip-key fob
- Extend the blade.
- Locate the rear-cover seam or release point. Inspect the area around the blade pivot and the outer edges.
- Open the cover at the designated point. Avoid levering against the folding mechanism.
- Photograph the installed battery.
- Record its complete code and orientation.
- Lift the cell from its accessible edge. Avoid disturbing adjacent components.
- Insert the exact replacement. Follow the photographed orientation and holder markings.
- Ensure the battery is under its retaining tabs and sits flat.
- Align and refit the rear cover.
- Fold and extend the blade once to confirm normal movement.
Some generalized flip-key procedures also specify positive-side down. That direction applies only where confirmed by the old battery or internal markings.
Standard remote
- Find the side slot or edge notch. Do not begin at an arbitrary point along the seam.
- Insert a correctly sized tool. Depending on the slot, this may be a plastic pry tool, coin, or small flathead screwdriver.
- Twist gently rather than pushing inward. This should begin separating the housing halves.
- Release the remaining clips gradually.
- Photograph the battery and record its code and orientation.
- Remove the cell carefully, keeping the tool away from the circuit board.
- Install the verified replacement. Engage any fixed retaining edge first.
- Check the fit. The battery should sit flat beneath its retainers rather than on top of a tab.
- Confirm that the rubber button pad remains positioned correctly.
- Align the housing halves and press around the perimeter.
Some generalized standard-remote procedures place the positive side up, unlike the positive-side-down instructions given for certain smart and flip-key fobs. This disagreement is why the original battery and internal markings must control installation.
Never force the case closed over a misaligned battery or button pad. Reopen it, correct the fit, and try again with gentle pressure.
Test Every Function After Reassembly
Begin close to the vehicle so normal range limits or environmental interference do not confuse the first test.
Test the functions fitted to your Chevrolet:
- Lock
- Unlock
- Trunk or liftgate release
- Panic button
- Remote start
- Passive entry
- Push-button-start recognition
Not every vehicle has all these functions. Test only the buttons present on the remote and the features installed on the vehicle.
Watch and listen for the expected response. Each button should move freely and return after release.
Inspect the housing:
- Is the seam even around the entire perimeter?
- Is a retaining clip visibly disengaged?
- Is the emergency key fully reinstalled?
- Does the flip blade move normally?
- Is any button caught beneath the housing?
- Does the remote rattle when moved gently?
After successful close-range testing, move a modest distance away and repeat lock and unlock. This is not intended to measure a precise maximum range; it simply checks whether useful operation has returned.
If most functions work but one does not, do not assume the new battery is at fault.
For a proximity vehicle, test both active button commands and passive recognition.
Troubleshoot a Fob That Still Does Not Work
If the remote remains dead or unreliable, change one variable at a time.
1. Verify the battery code
Reopen the housing and compare the replacement’s complete code with:
- The code recorded from the old battery
- The model-specific owner’s manual
- Any marking inside the holder
A cell that fits physically is not necessarily the specified replacement.
2. Confirm polarity
Compare the new battery with your photograph and inspect any internal + or − symbol. Reversed installation is a straightforward possible cause of complete nonresponse.
3. Check battery seating
Confirm that the cell:
- Lies flat
- Sits beneath the retaining tabs
- Touches the required contacts
- Does not move freely
- Has not caught on a plastic ledge
Do not use enough force to deform the holder.
4. Inspect case closure
Reopen and realign the housing if its seam is uneven.
5. Consider the replacement cell
If another verified, matching battery is available, test it to eliminate that possibility. Continued failure does not prove either that the first replacement was defective or that the remote is permanently damaged.
6. Inspect accessible contacts
Look for:
- Dirt or residue
- Corrosion
- A visibly loose contact
- A contact that does not appear to touch the battery
- Damage from an earlier opening attempt
Light surface contamination may be wiped gently with a clean, dry cotton swab. Stop if a contact is bent, loose, heavily corroded, or detached. Do not solder, scrape the circuit board, or reshape delicate contacts unless you have suitable electronics-repair expertise.
7. Check for physical or moisture damage
Inspect the fob for:
- Housing cracks
- Evidence of liquid inside the case
- A displaced rubber button pad
- Worn or torn button material
- Impact marks
- Loose internal components
- Visible circuit-board cracks or corrosion
If moisture has reached the electronics or the board appears damaged, stop the DIY process and seek professional inspection.
8. Compare the spare fob
If the spare works, concentrate on the original remote—its battery installation, contacts, buttons, synchronization, or electronics.
If both remotes fail, possible vehicle-side causes include:
- A weak or disconnected vehicle battery
- Receiver trouble
- Signal interference
- A door-lock or starting-system fault
The comparison is useful but not conclusive.
9. Seek model-specific diagnosis
Contact a qualified automotive locksmith or Chevrolet service provider when:
- The housing is cracked or will not close
- Battery contacts are loose, bent, detached, or heavily corroded
- Moisture has reached the electronics
- The circuit board appears damaged
- Both remotes fail
- The vehicle does not recognize a correctly assembled fob
- Synchronization or programming requirements are unclear
- A replacement remote or immobilizer key must be programmed
Physical damage and worn or misaligned terminal contacts can cause failure even when the battery is correct. Nucar Chevrolet’s troubleshooting discussion identifies these as alternatives to a weak cell.
Know When Synchronization or Emergency Access Is Model-Specific
Four procedures are often confused:
- Battery replacement: Installing a new cell in the existing fob
- Resynchronization: Restoring communication between an already programmed fob and the vehicle
- Replacement-remote programming: Registering another remote
- Immobilizer-key programming: Authorizing a key or transponder to start the vehicle
These procedures are not interchangeable. Routine battery replacement often leaves existing programming intact, but some vehicles may require a model-specific resynchronization step if the fob remains unrecognized.
Do not treat instructions such as holding Lock and Unlock together or cycling an ignition key in a particular sequence as universal Chevrolet procedures. A sequence intended for one generation, ignition system, or remote design may not apply to another. It may also concern replacement-remote programming rather than battery replacement.
If the battery code, polarity, seating, and housing closure are correct but the vehicle still does not recognize the fob, consult the owner’s manual for the exact model and year. General guidance on key-fob battery warning signs and replacement considerations likewise advises using the owner’s manual when resynchronization is required.
Many fobs contain a removable mechanical key that may permit emergency entry through a visible or concealed door lock. The method for accessing the lock cylinder varies, so use the model-specific instructions rather than prying exterior trim.
Some push-button-start vehicles may detect a weak or dead fob at a designated backup location. The correct location and starting sequence vary by vehicle; do not assume the fob belongs in a cupholder, center console, or beside the start button.
Keep the removed cell secure and separate from the replacement during the repair. Once the fob works, take the old lithium coin cell to an appropriate battery-recycling location where available.
Frequently Asked Questions
What battery does a Chevy key fob use?
Many Chevrolet key fobs use a CR2032 3-volt coin cell, but CR2032 is not universal. Some smart remotes may use CR2450, and another design may specify a different battery. Chevrolet dealership guidance supports verifying the code rather than assuming compatibility.
Check the model-specific owner’s manual, read the complete number engraved on the old battery, and inspect any diagram or marking inside the housing.
Which way does the battery go in a Chevrolet key fob?
There is no universal polarity direction. Some generalized smart and flip-key procedures place the positive side down, while some standard-remote instructions place it up.
Photograph the original cell before removing it and follow the same orientation, subject to any clear + or − marking inside the holder. If the battery was already disturbed, consult model-specific instructions.
Do I need to reprogram my Chevy key fob after changing the battery?
Routine battery replacement often does not erase the fob’s existing programming. Some models may nevertheless require a specific resynchronization step if the fob remains unrecognized.
First verify the battery code, polarity, seating, and case closure. Then consult the owner’s manual for the exact vehicle. Do not assume a generic button-hold or ignition sequence applies to every Chevrolet.
Why is my Chevy key fob still not working with a new battery?
Possible causes include:
- The wrong battery code
- Reversed polarity
- Poor battery seating
- Incomplete case closure
- A discharged or defective replacement cell
- Dirty, corroded, bent, or loose contacts
- A displaced or worn button pad
- Moisture or impact damage
- Lost synchronization
- Signal interference
- A weak vehicle battery
- A receiver, door-lock, or starting-system fault
Test a spare fob if one is available. One working remote points toward a fault in the other; failure of both makes a vehicle-side problem more plausible.
Can I unlock or start my Chevy when the key-fob battery is dead?
Many Chevrolet fobs contain a removable mechanical key that may provide emergency entry. Some push-button-start vehicles may also recognize a weak fob at a designated backup location.
The door-lock access point, backup detection location, and starting procedure vary by model. Follow the exact vehicle owner’s manual rather than assuming a universal location or sequence.
Final checklist
- Identify the fob as a smart/proximity, flip-key, or standard remote.
- Confirm the old battery’s complete code.
- Photograph its polarity before removal.
- Open the housing only at the designated slot, seam, or notch.
- Install an exact-code replacement in the recorded or marked orientation.
- Ensure the cell is seated beneath its retaining contacts.
- Close the case fully and evenly.
- Reinstall the emergency key where applicable.
- Test every function fitted to the vehicle.
- If operation does not return, compare a spare and consult the model-specific owner’s manual to determine whether synchronization, fob repair, or vehicle-side diagnosis is appropriate.