
How to Change a VW Key-Fob Battery Without Guessing
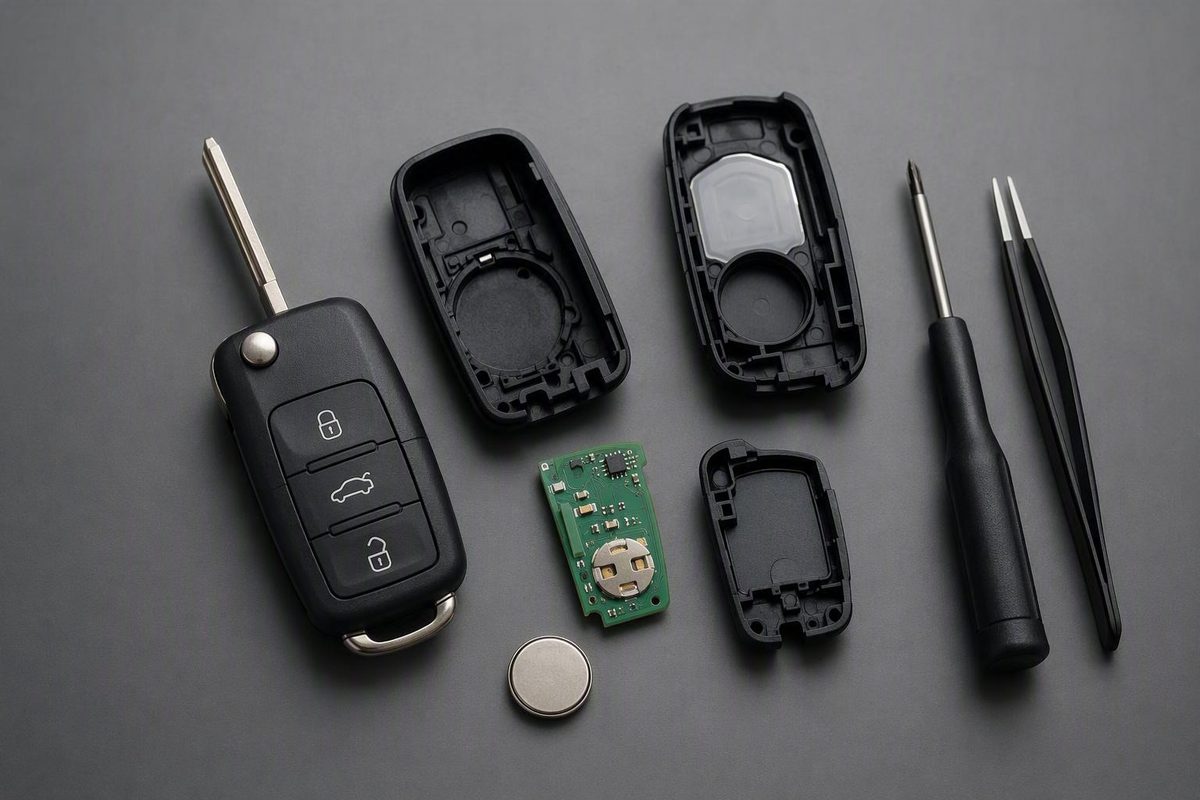
CR2032 is common in many switchblade and smart-key housings, while CR1632 may appear in some older simple-key fobs. Read the full code first.
Quick answer: the verification-first replacement process
The safest Volkswagen battery replacement for a key fob follows a simple sequence: verify, open, copy, replace, close, and test.
- Release, extend, or remove the mechanical emergency key, if fitted.
- Identify the housing’s intended seam, notch, cover, or release.
- Open the case gently, using a suitable flat tool only when the design calls for one.
- Before removing the old battery, photograph its code, visible face, orientation, and position.
- Read the complete battery designation and obtain an exact replacement.
- Install the new cell in the same position, also following any compartment markings.
- Confirm that the battery sits flat and contacts the intended retaining points.
- Align and close the housing evenly, then restore the emergency key.
- Test every available button, proximity feature, starting recognition function, and operating range.
There is no universal Volkswagen key-fob battery, opening method, or polarity rule. CR2032 is commonly reported for many pod-shaped, switchblade, retractable-key, and smart-key housings, while CR1632 may appear in some older, simple-key-style fobs. These are qualified patterns, not model-specific fitment guarantees. Volkswagen dealership guidance recommends confirming the code on the existing cell because requirements vary by key design according to Volkswagen of Daphne’s key-battery guide.
Read the entire battery code before purchasing the replacement. Do not rely only on “2032,” “1632,” the vehicle’s age, the shape of the key, or a generic compatibility listing. If the battery cannot be inspected safely, consult the owner documentation for the exact vehicle and key design or ask a Volkswagen dealer or qualified automotive key professional to identify it.
Stop if the housing does not release with light, controlled pressure at the expected opening point. The key may use another release mechanism, and additional force can damage clips, contacts, the shell, or internal components as cautioned in design-specific dealership guidance.
Signs that the key-fob battery may be weak
A weakening key-fob battery often produces declining performance before the remote stops responding. Common signs include:
- Reduced locking or unlocking range
- Delayed response after a button press
- Intermittent operation
- The need to press a button repeatedly
- A low-key-battery dashboard message on equipped vehicles
- A smart key that must be held closer to the vehicle before proximity entry or starting recognition works
These indicators are included in Volkswagen dealership guidance, although the available warnings and features depend on the vehicle and fob as summarized by Balise Volkswagen.
The pattern provides useful context. A gradual reduction in range followed by intermittent response is consistent with a weakening battery. A lost key is a separate problem and cannot be recovered through a battery change.
Battery-like symptoms do not prove that the cell is the only fault. Poor seating, damaged housing parts, worn buttons, displaced contacts, or a synchronization issue can produce similar behavior.
If you have a spare key, make a controlled comparison:
- Stand in the same location.
- Send the same lock or unlock command.
- Compare response time and usable range.
- If supported, compare proximity-entry and start recognition.
If the spare works normally while the primary fob remains weak, focus first on the primary key. If both keys show the same symptom, consult model-specific documentation or qualified service rather than trying to diagnose the vehicle from the fobs alone.
For a broader explanation of gradual range loss and repeated button presses, see this guide to key-fob battery lifespan and warning signs. Its guidance is general rather than Volkswagen-specific, so use the Volkswagen-focused identification and opening procedures below for the actual repair.
CR2032 or CR1632? Identify the battery before buying
CR1632 is reported as a possible fit for some older fobs that resemble a simple car key. Dealership sources qualify both associations rather than providing an exhaustive model, year, region, and key-part-number table as Volkswagen of Marietta’s overview makes clear.
Appearance and vehicle age are therefore only initial clues. A broad rule such as “newer Volkswagens use CR2032” cannot establish the correct battery for every key revision, replacement housing, or regional variant. Nor does an older vehicle automatically establish that its key uses CR1632.
Use this verification order:
- Inspect the installed cell. Read its complete printed or stamped designation.
- Check the battery compartment. Look for a molded or printed code and
+or–symbol. - Photograph the installation. Capture the visible face, full code, position, and nearby retaining points before removing the cell.
- Compare the evidence. The old cell and compartment marking should agree. If the replacement history is unknown or they conflict, do not assume the installed cell is correct.
- Consult model-specific documentation. Use documentation for the exact vehicle and key design when the code is unreadable or the installation appears altered.
- Seek design-specific help if uncertainty remains. Bring the complete fob, vehicle details, and any visible key or housing part number to a dealer or automotive key professional.
Install only the code specified by the existing installation, compartment marking, or model-specific documentation.
Do not purchase a battery solely because an online listing names your Volkswagen model. A listing may omit the model year, key style, region, or part-number limitations. Likewise, if the key has a replacement shell or has previously been disassembled, verify the compartment rather than assuming the exterior identifies the battery.
The pre-removal photograph is particularly valuable because published polarity instructions conflict. Take the picture squarely in good light, ensuring that the visible + marking or other face can be read.
If the old battery is missing and the compartment has no readable code, do not guess. Identify the fob through model-specific documentation or professional inspection before installing a cell.
Tools, workspace, and damage-prevention checks
Battery identification and battery replacement may be two separate sessions. If you do not yet know the code, first open the housing only far enough to record the installed cell safely. Obtain the exact replacement, then return to a prepared workspace for installation.
For the replacement itself, you need:
- The Volkswagen key fob
- The correctly matched replacement coin cell
- A clean, stable, well-lit work surface
A small flat-head screwdriver or suitable flat pry tool can help with some seam-opening housings. Covering a metal tip with tape can reduce cosmetic scratching, as recommended in a dealership procedure for that type of housing by Lithia Volkswagen of Des Moines.
A screwdriver is not appropriate for every key. Identify the opening mechanism before selecting a tool.
Work over a light-colored towel or shallow tray so the battery and any loose housing pieces cannot roll away. Remove loose key rings if they interfere with your grip, but do not remove pins, fasteners, or structural components merely because they are visible.
Before opening the fob:
- Clean and dry your hands.
- Examine the shell for existing cracks or gaps.
- Identify the emergency-key release.
- Look for a notch, widened seam, sliding cover, or separate release.
- Have a phone or camera ready.
- If this is the installation session, confirm that the replacement package shows the exact required code.
Avoid:
- Driving a screwdriver into the middle of the shell
- Prying against a button
- Twisting aggressively when a clip has not released
- Inserting a metal tool deeply toward the electronics
- Pulling or repeatedly bending battery contacts
- Closing the shell over a tilted or incorrectly fitted cell
Use only enough tool insertion to engage the intended opening point. Once a small gap appears, use finger pressure where practical and release the cover gradually. Forcing an unidentified seam can damage the shell, clips, contacts, or internal components.
Keep the old battery until the new cell is installed and the key has passed all tests. It remains a useful reference for the code and previous orientation, but compare it with the compartment markings when possible—especially if the fob’s replacement history is unknown.
How to replace the battery in a retractable-key or seam-opening fob
This walkthrough applies only to a Volkswagen key that visibly matches a retractable-key or seam-opening design. It is not a universal Volkswagen procedure. The linked sources are dealership guidance rather than manufacturer service manuals, so model-specific Volkswagen documentation takes priority for exact opening points, polarity, and resynchronization instructions.
1. Release the mechanical key
Press the key release and extend or remove the mechanical emergency key as the design permits. Do not pull against the latch.
Opening or removing the key may expose the intended working area and provide a safer grip. It can also reveal the notch or seam used to remove the battery cover.
2. Find the intended seam or release point
Inspect the area near the opened or removed key section. Look for:
- A distinct notch
- A widened section of the housing seam
- A slot intended for a flat tool
- A cover edge separate from the main shell
- A release tab exposed by emergency-key removal
Do not start at an arbitrary outer edge just because a line is visible. The line may be decorative or may join parts that are not intended to separate for battery service.
3. Open the housing gently
Try finger pressure first when the design provides enough grip. If the seam starts to open, maintain a small, even gap rather than pulling one corner far from the housing.
If a tool is necessary, insert a taped flat tip only into the intended notch or seam. Use a small lifting or twisting movement that follows the apparent release direction. Keep the tool shallow and away from the electronics.
If the housing does not move with controlled pressure, stop and reassess the design. Do not turn uncertainty into extra force.
4. Record the old battery
Once the compartment is visible, leave the battery in place long enough to record it:
- Photograph the installed cell.
- Read its complete designation.
- Note which face is visible.
- Check for
+or–markings in the compartment. - Observe whether the cell slides under a contact, clips beneath a tab, or lifts out.
- Note the position of any cover, insert, or gasket.
This creates a reference for battery selection, polarity, and installation position.
5. Remove and replace the battery
Lift or slide the old cell out through the available clearance. Avoid bending retaining contacts more than the design requires.
Before installation, compare the cells:
- The complete battery code should match.
- The new cell should fit the holder without force.
- Its polarity should match the original photograph and compartment markings.
- It should sit flat against the intended contacts or retaining points.
Published polarity instructions cannot be generalized. Some dealership procedures for their depicted seam-opening fobs specify positive-side down including Volkswagen of Marietta’s procedure, while another generalized guide specifies positive-side up in Frank Boucher Volkswagen of Racine’s instructions. Copy the original installation and follow the markings inside your own fob instead of applying either direction universally.
6. Close the case and restore the key
Before closing, verify that:
- The battery is flat.
- It is retained at the intended points.
- No contact is caught beneath the wrong edge.
- Buttons and internal tabs remain aligned.
- Any gasket, cover, or insert is in its original position.
- Nothing projects above the normal closing surface.
Align the housing halves before pressing them together. Apply even pressure around the perimeter until the clips engage and the seam is uniform. Do not use the case to force a tilted battery into position.
Restore the emergency key and operate its release once. It should extend, remove, fold, or lock back into place normally.
When the housing looks different: smart keys and shiny-pin fobs
Volkswagen has used multiple key housings. Choose the procedure by the design physically in your hand, not by the Volkswagen badge alone.
Newer smart-key housings
On some smart-key designs, removing the emergency key makes a rear seam or battery-cover release accessible. Verify the actual release point before inserting a tool.
Look for a recessed notch, a distinct change in the seam, or a rear panel that is visibly separate from the main body. A seam around the entire housing does not necessarily mean the complete shell should be pried apart.
If a cover starts to lift at its release point, work evenly and keep any tool shallow. If one edge lifts while another remains firmly retained, look for another clip or a sliding motion instead of twisting harder.
Shiny-pin fobs with a plastic release
One community-contributed repair guide documents a Volkswagen housing identified by a visible shiny pin and a small plastic square or release. For that specific design, pulling the plastic release opens the casing, and a spudger or pointed object can help lift the specified CR2032 from its ledge in the illustrated iFixit procedure.
That procedure applies only to the pictured shiny-pin housing. Do not transfer it to a fob without the same pin, plastic release, cover arrangement, and internal holder.
When lifting a battery with a spudger or pointed tool, engage only the designated battery edge. Do not probe around the circuit board or use the tool to reshape the holder.
What resistance is telling you
Possible explanations include:
- The release has not been fully pressed.
- The emergency key must be removed rather than merely extended.
- The battery cover slides instead of lifting.
- Another retaining clip remains engaged.
- The visible line is not the service seam.
- The fob uses a different procedure.
Stop before damaging the shell, clips, contacts, or electronics. If the key cannot be matched confidently to a documented design, use the vehicle’s model-specific documentation or take the complete key to a Volkswagen dealer or qualified automotive key professional.
Close the case, test every function, and assess programming
After installing the battery, inspect the key before leaving the workspace.
Confirm that:
- The battery is seated flat.
- The housing seam is even.
- There are no unexplained gaps.
- The clips appear engaged.
- The buttons move and return normally.
- The emergency key is restored and retained correctly.
- No housing component remains on the work surface.
Test every function fitted to the key and vehicle:
- Lock
- Unlock
- Trunk or hatch release
- Panic button
- Proximity entry
- Push-button-start recognition
Do not treat one successful unlock beside the driver’s door as a complete test. Move farther away and check whether useful operating range has returned. Test more than one button and repeat any function that was previously intermittent.
A key that worked before its battery weakened will often operate immediately after routine battery replacement and normally retains its existing programming. Some models may require resynchronization, however, so use the exact vehicle’s owner documentation if a correctly installed battery does not restore operation as Balise Volkswagen distinguishes in its guidance.
These are different tasks:
- Battery replacement restores power to the existing fob.
- Resynchronization may restore communication for an existing key.
Do not use a generic internet resynchronization sequence as universal Volkswagen guidance. Button combinations, timing, ignition requirements, and supported procedures can vary. Follow model-specific documentation or obtain qualified assistance.
Emergency access and dead-fob starting methods also vary by vehicle. Use the owner’s manual for the exact model rather than relying on a universal key-placement instruction.
If the Volkswagen key still does not work
Persistent failure after battery replacement does not automatically mean the key lost its programming. Troubleshoot the physical installation first, from the simplest check to the least likely or most invasive possibility.
1. Confirm the battery code
Reopen the housing at the correct release point. Compare the new cell’s complete designation with the old battery, compartment marking, or model-specific documentation.
If the code is wrong, remove the cell. Do not compensate with packing material, bent contacts, or extra pressure from the case.
2. Recheck polarity
Compare the new battery with the photograph taken before removal and with any + or – symbol inside the compartment.
Do not rely on memory or a general positive-side-up or positive-side-down rule.
3. Reseat the battery
Remove and reinstall the cell carefully. Confirm that it:
- Slides under the correct contact where required
- Rests inside the holder rather than on its edge
- Sits level
- Is retained securely
- Meets the intended contact surfaces
4. Inspect the contacts without attempting board repair
Look for a contact that appears displaced, flattened, trapped beneath the battery, or contaminated. Do not scrape the circuit board, apply liquids, resolder components, or repeatedly bend delicate contacts.
A broken, detached, badly distorted, or corroded contact takes the repair beyond an ordinary battery change.
5. Check the housing and buttons
Inspect for:
- Broken shell clips
- A cover that will not close flush
- Displaced internal tabs
- Buttons that stick or no longer click normally
- A shifted or damaged button membrane
- Cracks from impact
- Evidence of moisture or contamination
- A battery that moves when the case is handled
The housing helps hold the battery, buttons, and contacts in their intended positions.
6. Compare which functions fail
If every function is dead, possible causes include the wrong battery, reversed polarity, poor seating, inadequate contact, a synchronization issue, or an internal electrical fault.
Inspect that button, its membrane, and the fob’s internal condition.
If the buttons work but proximity entry does not, compare the spare key and consult model-specific documentation before drawing a conclusion.
7. Separate resynchronization from replacement-key programming
For an existing key that previously worked, check the owner documentation for a model-specific resynchronization process. Do not assume that opening the housing or replacing the battery erased the key.
A lost, newly obtained, seriously damaged, or electronically defective key follows a different escalation path and may require professional programming. Some dealerships also request a driver’s license and proof of ownership for replacement-key transactions; those security requirements are separate from an ordinary coin-cell change as Volkswagen South Coast explains in its key-service guidance.
Seek help from a Volkswagen dealer or qualified automotive key professional when:
- The correct battery and orientation do not restore operation.
- You cannot identify the intended opening method.
- The shell is cracked or will not remain closed.
- A battery contact appears broken or badly distorted.
- The key shows impact or moisture damage.
- Buttons or internal electronics appear defective.
- Model-specific resynchronization is unsuccessful.
- A lost or newly obtained key requires programming.
Frequently asked questions
Do all Volkswagen key fobs use a CR2032 battery?
No. CR2032 is commonly reported for many pod-style, switchblade, retractable-key, and smart-key fobs, but it is not universal. Some older, simple-key-style designs may use CR1632; both associations are qualified rather than guaranteed in Capitol Volkswagen’s battery overview.
Use appearance only as an initial clue. Read the complete code on the installed cell, check the compartment, and consult model-specific documentation if those sources are missing or conflict.
Should the positive side of a VW key battery face up or down?
It depends on the fob. Dealership procedures disagree: some depicted seam-opening designs specify positive-side down, while a generalized guide specifies positive-side up.
Photograph the original battery, copy its orientation, and follow the compartment’s polarity markings. If the cell has already been removed and no marking is readable, obtain design-specific instructions rather than guessing.
Does a Volkswagen key need reprogramming after a battery change?
A previously working key will often operate immediately and retain its programming after routine battery replacement. Some models may require resynchronization.
Programming a newly obtained replacement key is a separate matter. Use model-specific owner documentation for resynchronization and qualified assistance for a lost, damaged, defective, or replacement key.
Why does my VW key fob still not work with a new battery?
Possible causes include:
- The wrong battery code
- Reversed polarity
- Poor battery seating
- Inadequate or displaced contact pressure
- A housing that is not fully closed
- Broken clips or internal tabs
- A worn or damaged button
- Impact or moisture damage
- A need for model-specific resynchronization
- An internal electronic fault
Recheck the battery and physical installation before assuming programming has been lost. If only one function fails, investigate that button or the fob’s internal condition rather than treating the battery as completely dead.
Can I replace a Volkswagen key-fob battery without a screwdriver?
Sometimes. Certain housings open with finger pressure or a dedicated plastic release, while seam-opening designs may benefit from a small flat tool.
Do not substitute an unsuitable sharp object, and do not use a screwdriver solely because one appears in instructions for another housing. If a metal tool is appropriate, tape its tip, keep it shallow, and use it only at the intended opening point.
Final verification checklist
- Match the replacement battery’s complete code to the installed cell, compartment specification, or model-specific documentation.
- Copy the original polarity and position instead of applying a universal up-or-down rule.
- Open the housing only at the release point intended for the visible key design.
- Confirm that the battery sits flat and the case closes securely without unexplained gaps.
- Restore the emergency key and test every available function and operating range.
- Remember that CR2032 is common and CR1632 is possible, but neither should be selected from vehicle age or appearance alone as the qualified dealership guidance indicates.
- If the housing resists opening or a correctly installed battery does not restore operation, stop before causing damage and consult model-specific Volkswagen documentation, a dealer, or a qualified automotive key professional.