
How to Change Your F-150 Key Fob Battery Without Guessing the Size
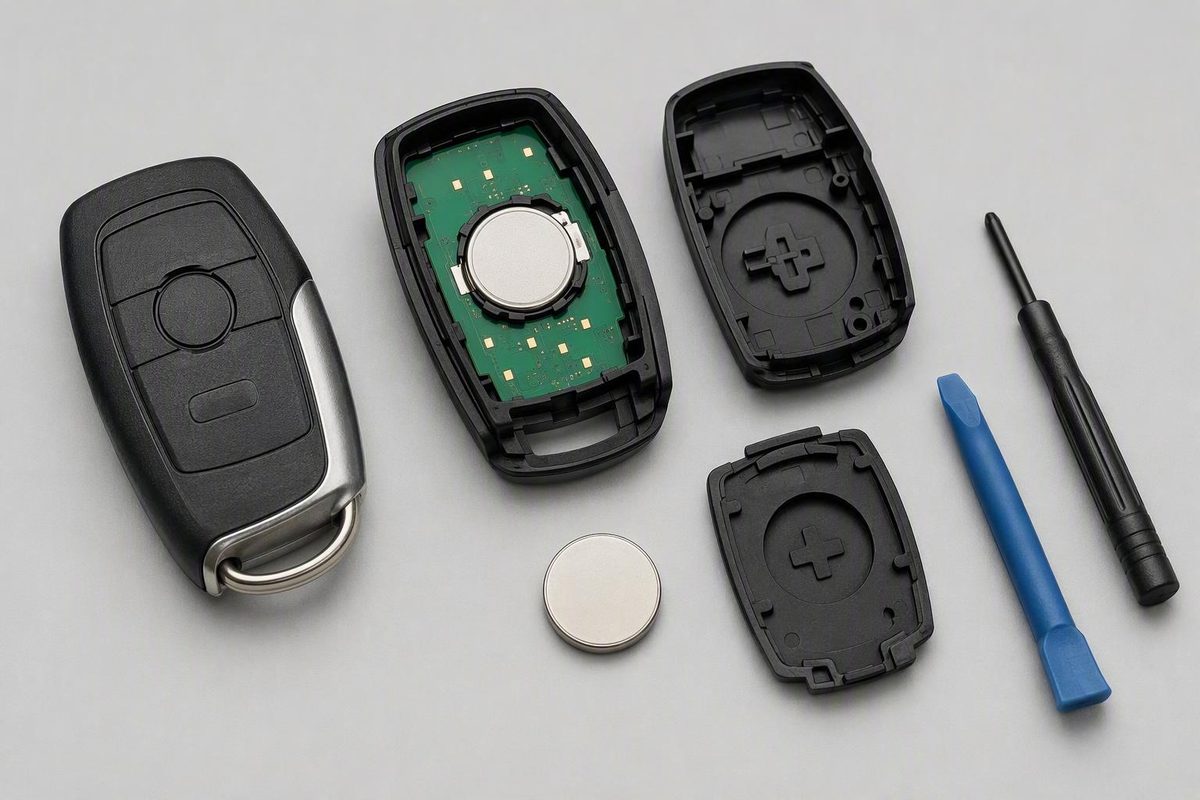
Check the old cell, holder or Owner’s Manual for the exact battery, record polarity, open the case gently and test the fob after reassembly.
You can usually replace a Ford F-150 key fob battery at home, but no single battery size or opening method is confirmed for every F-150 fob. Verify the exact coin cell from the old battery, holder markings, or applicable Owner’s Manual; record the original polarity; open the case gently; and test the fob after reassembly.
Check the battery size before buying a replacement
Do not assume every Ford F-150 key fob uses a CR2032. Ford identifies its key-fob battery generally as a coin-type three-volt lithium battery and directs owners to the applicable Owner’s Manual under Keys and Remote Control for model-specific instructions.
A Riverside Ford guide to Ford key-fob batteries describes the CR2032 as common while noting that some Ford fobs use a CR2025 or CR2450. That general guidance does not establish which battery belongs to a particular F-150 model year, trim, or fob design, so treat these sizes as possibilities rather than an F-150 compatibility list.
Use this verification order:
- Read the code stamped on the old battery. Look for the complete designation, such as CR2032.
- Check the battery holder. It may include a battery code, a polarity symbol, or both.
- Consult the applicable Owner’s Manual. Check Keys and Remote Control if the battery code or installation direction remains uncertain.
If the removed battery is marked CR2032 and that agrees with the holder or manual, install a fresh CR2032. Do not select a CR2025 or CR2450 merely because a generic list says it fits Ford key fobs.
If the old battery, holder markings, and Owner’s Manual disagree, stop before installing a replacement. A previously fitted battery could be incorrect. Confirm compatibility through the model-specific Ford manual or Ford support rather than relying on the old cell alone.
Coin cells with different codes are not automatically interchangeable. The replacement must match the verified battery designation.
Gather the tools and protect the fob
Before opening the fob, gather:
- A fresh battery matching the verified code
- A plastic trim or pry tool
- A small flathead screwdriver if a plastic tool is unavailable
- A clean cloth to protect the work surface
- A phone or camera to record the battery orientation
The intended opening point varies by fob design. If the fob has a removable emergency key, take it out and inspect the exposed area and outer seam for a notch or slot intended for case separation. Do not insert a screwdriver into the middle of the housing.
Apply light twisting pressure at the intended notch. If the case does not begin to separate, stop and check the opening point instead of increasing force. Forceful prying can crack the housing or retaining clips. Keep the tool away from the circuit board and lift the battery from its edge rather than using electronic components as leverage, as advised in Riverside Ford’s general replacement guidance.
Ford also instructs owners not to wipe grease from the battery terminals or the back of the circuit board. Leave that material in place. Before removing the old cell, photograph the visible face and note any positive or negative markings in the holder; battery orientation should not be based on a universal “positive side up” assumption.
Replace the battery step by step
This is a general Ford workflow, not a design-specific procedure verified for every F-150 model year. If your Owner’s Manual provides a different opening or installation sequence, follow the manual.
- Remove the emergency key, if equipped. Operate its release and pull the key out.
- Find the designated opening point. Look for a notch, slot, or accessible section of the case seam.
- Separate the housing gently. Insert a plastic trim tool or small flathead screwdriver at that point and twist lightly.
- Identify the battery and orientation. Read the complete code and compare it with the replacement. Record which face is visible before moving the cell.
- Lift the old cell from its edge. Do not press on the circuit board or pry against electronic components.
- Install the verified replacement. Handle the new cell by its edges and match the original polarity or the holder markings.
- Check the seating. Make sure the battery lies flat and meets the retaining contacts without rocking or protruding.
- Close the housing. Align the halves and press around the perimeter until the clips engage. If the case remains uneven, reopen it and check the battery position rather than forcing it closed.
- Reinstall the emergency key.
- Test every button and access function fitted to the truck.
Test the fob—reprogramming normally is not required
Ford says replacing the battery does not erase the programmed key from the vehicle. Ford’s official key-fob battery guidance therefore supports checking the installation before assuming that a newly unresponsive fob has lost its programming.
Stand near the truck and test the functions actually present on your fob and vehicle:
- Lock
- Unlock
- Panic alarm
- Remote start, if equipped
- Proximity entry, if equipped
If the fob fails immediately after replacement, first check the battery code, polarity, seating, contact position, and battery freshness. These are sensible installation checks, not proof that one of them caused the failure.
Reduced range, delayed response, or repeated button presses can be consistent with a weak battery, but those symptoms do not establish that the battery is the only possible cause. A replacement cell may not correct a damaged fob, worn contact, failed button, or vehicle-side problem.
Use this troubleshooting table if the fob still does not work
| Symptom | First check | Next action |
|---|---|---|
| Fob is completely unresponsive | Verify the battery code, polarity, seating, and freshness | Reinstall the cell carefully; if nothing changes, try another verified fresh battery |
| Response is intermittent or range remains short | Confirm that the cell lies flat, the contacts touch it, and no loose debris obstructs the holder | Remove only loose debris without wiping away protective grease, then retest near the truck |
| Case will not close | Check for the wrong battery size, reversed polarity, or improper seating | Remove and reseat the battery; do not force the clips together |
| One fob fails but a spare works | Repeat the battery and installation checks on the failing fob | Seek diagnosis of that fob if a verified installation does not restore operation |
| Neither fob works normally | Confirm that both fobs have correctly installed, verified fresh batteries | Seek diagnosis of possible fob or vehicle-side causes |
A working spare indicates that the first fob deserves closer examination, but it does not identify a particular internal defect. Likewise, two unresponsive fobs do not by themselves prove that the vehicle receiver has failed.
If a correctly identified fresh battery is installed with the proper polarity and contact but operation does not return, contact Ford or a qualified automotive locksmith. Further diagnosis may need to distinguish among fob damage, worn contacts, button failure, and a vehicle-side issue.
Dispose of the old coin cell responsibly
Keep the removed coin cell secure until it can be taken to an appropriate local battery collection, recycling, or disposal location. Do not leave it loose in the truck or on a workbench where it could be misplaced.
Ford advises following local battery-disposal regulations, which vary by location. Check your municipal waste or recycling service for an appropriate local option rather than assuming that a single nationwide program applies. This disposal instruction appears in Ford’s official battery-replacement guidance.
The safest workflow is to identify the exact cell, copy the documented polarity, handle the case and electronics gently, and test the fob before suspecting lost programming. If a verified fresh battery and careful installation do not restore operation, move on to further fob or vehicle-side diagnosis instead of continuing to swap coin cells.